I am getting really into this aspect of the hobby and getting better with every attempt.
Let’s make this a resource to share and help others with their DIY PnP stuff!
Booklets, Hardbound Books, Cards, Tokens, Game Pieces Etc!
5 Likes
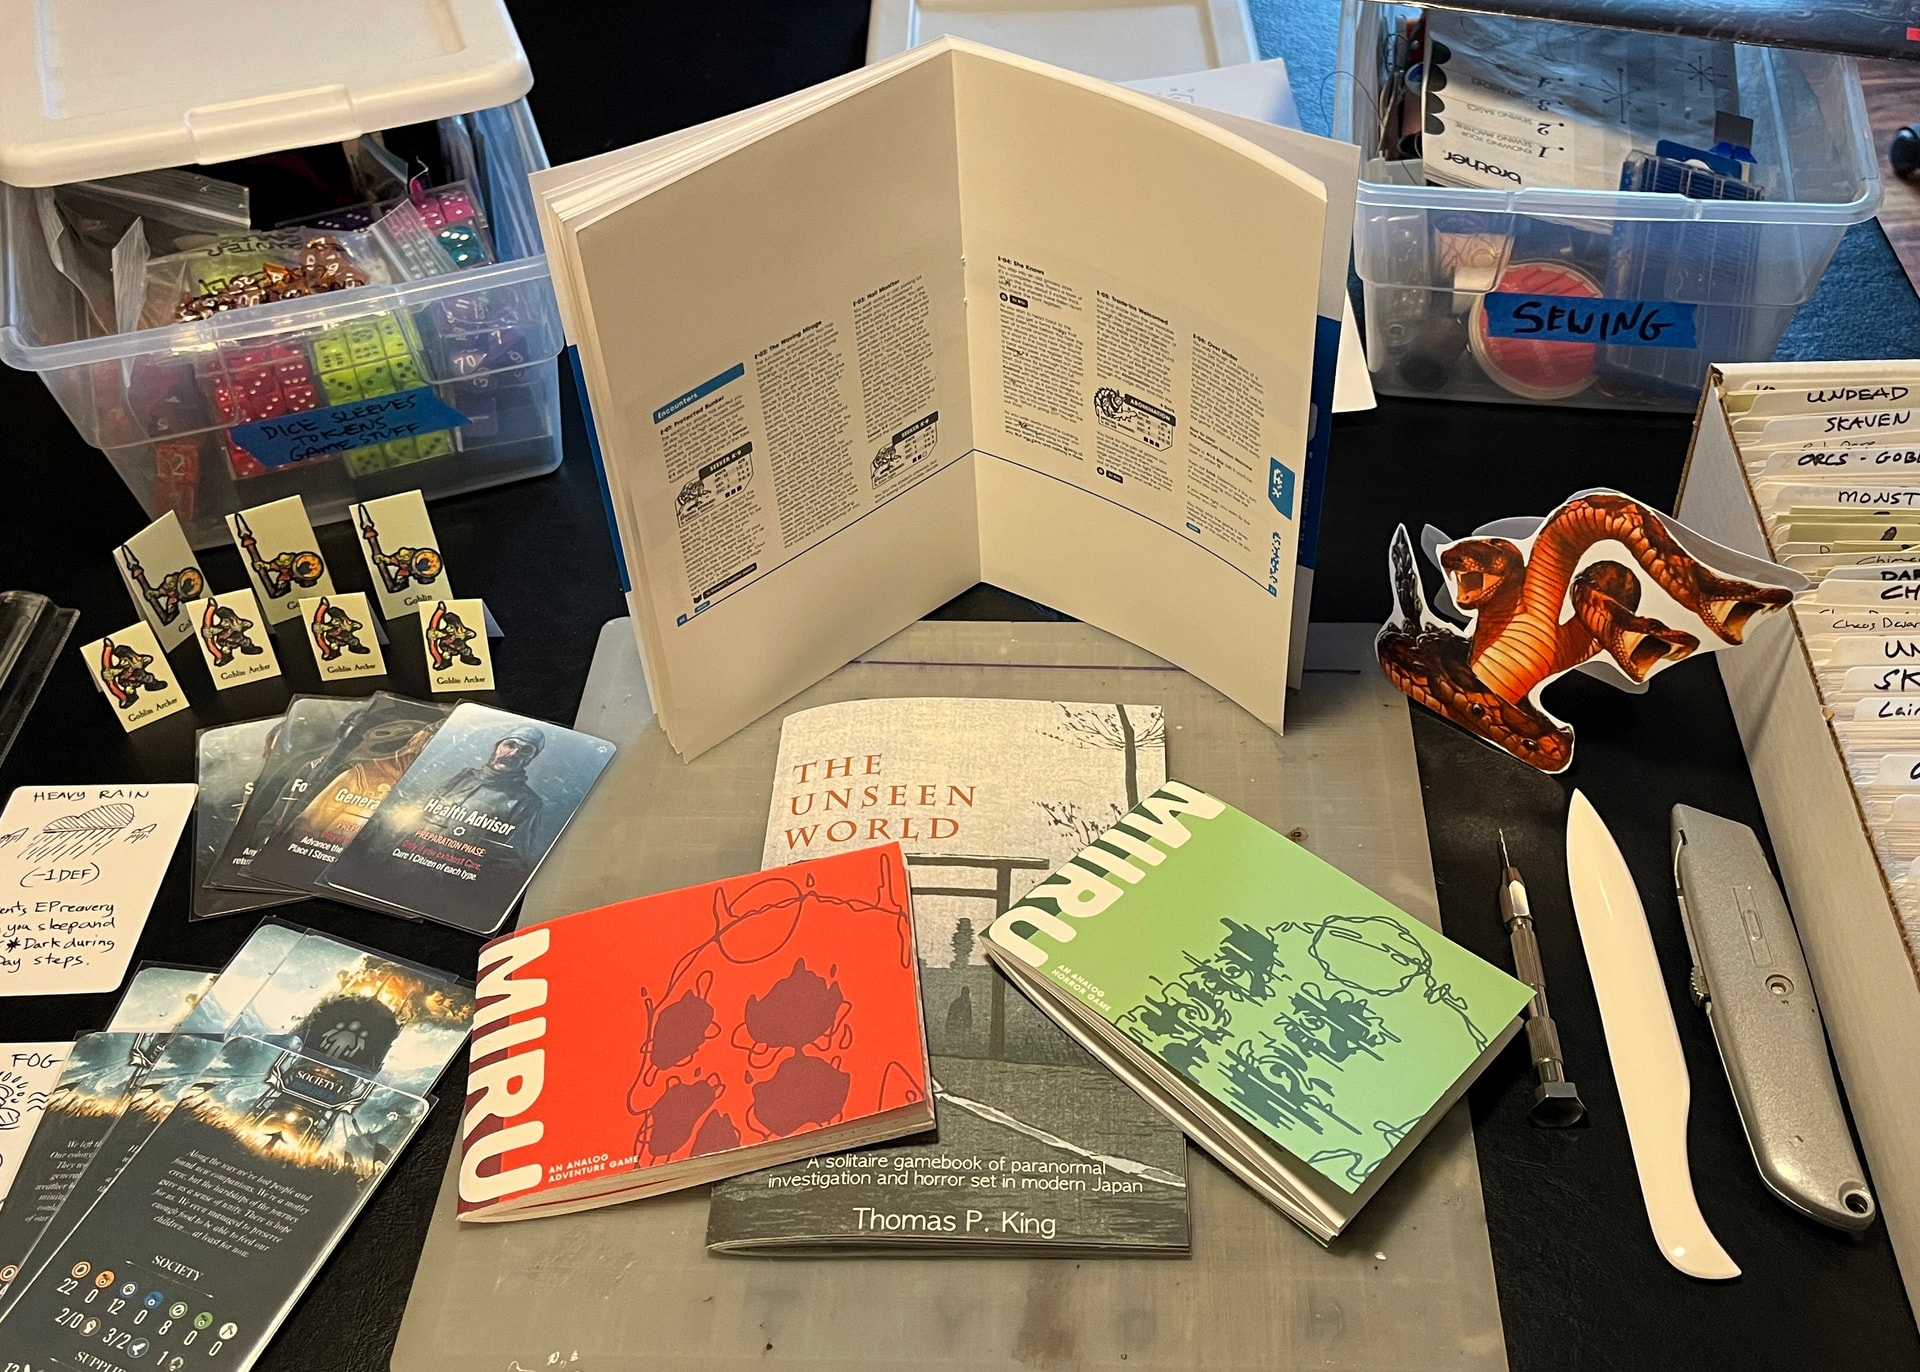
I’ll start by sharing where I am currently at with the booklet making.
I haven’t gone past 16 sheets of paper for a single Signature, (Or Section or Gathering) and I have only completed single signature booklets so far.
First I print the cover on cardstock. (Neenah White Index Paper, Mediumweight, 300 Sheets, 199 GSM, 94 Brightness, 8.5" x 11")
I set the printer for Booklet, Borderless, one side at a time. “Front only then back only.”
I then fold the cover in half using this awesome new tool I inherited called a Bone Folder. Mine is heavy plastic by Martha Stewart and I love it.
My Brother MFC-J491DW inkjet printer cannot do double sided printing if it’s set on borderless, that is why I do the cover in two steps.
Now with the meat of the book, I take the print settings off of borderless. I guess I will mention that I set the printer settings to “Normal Paper, Best Quality. I also go into the advanced settings and turn off Match Monitor, Bi-Directional Printing and change the data transfer settings to Highest Quality.
Now I can print the sheets one at a time (four pages) double sided and have a good edge to trim away at the end. If you have not done this before, when you compile all your folded pages they will prgressively stick out further from the outside edge the closer you get to the center of the book, we need to cut that away.
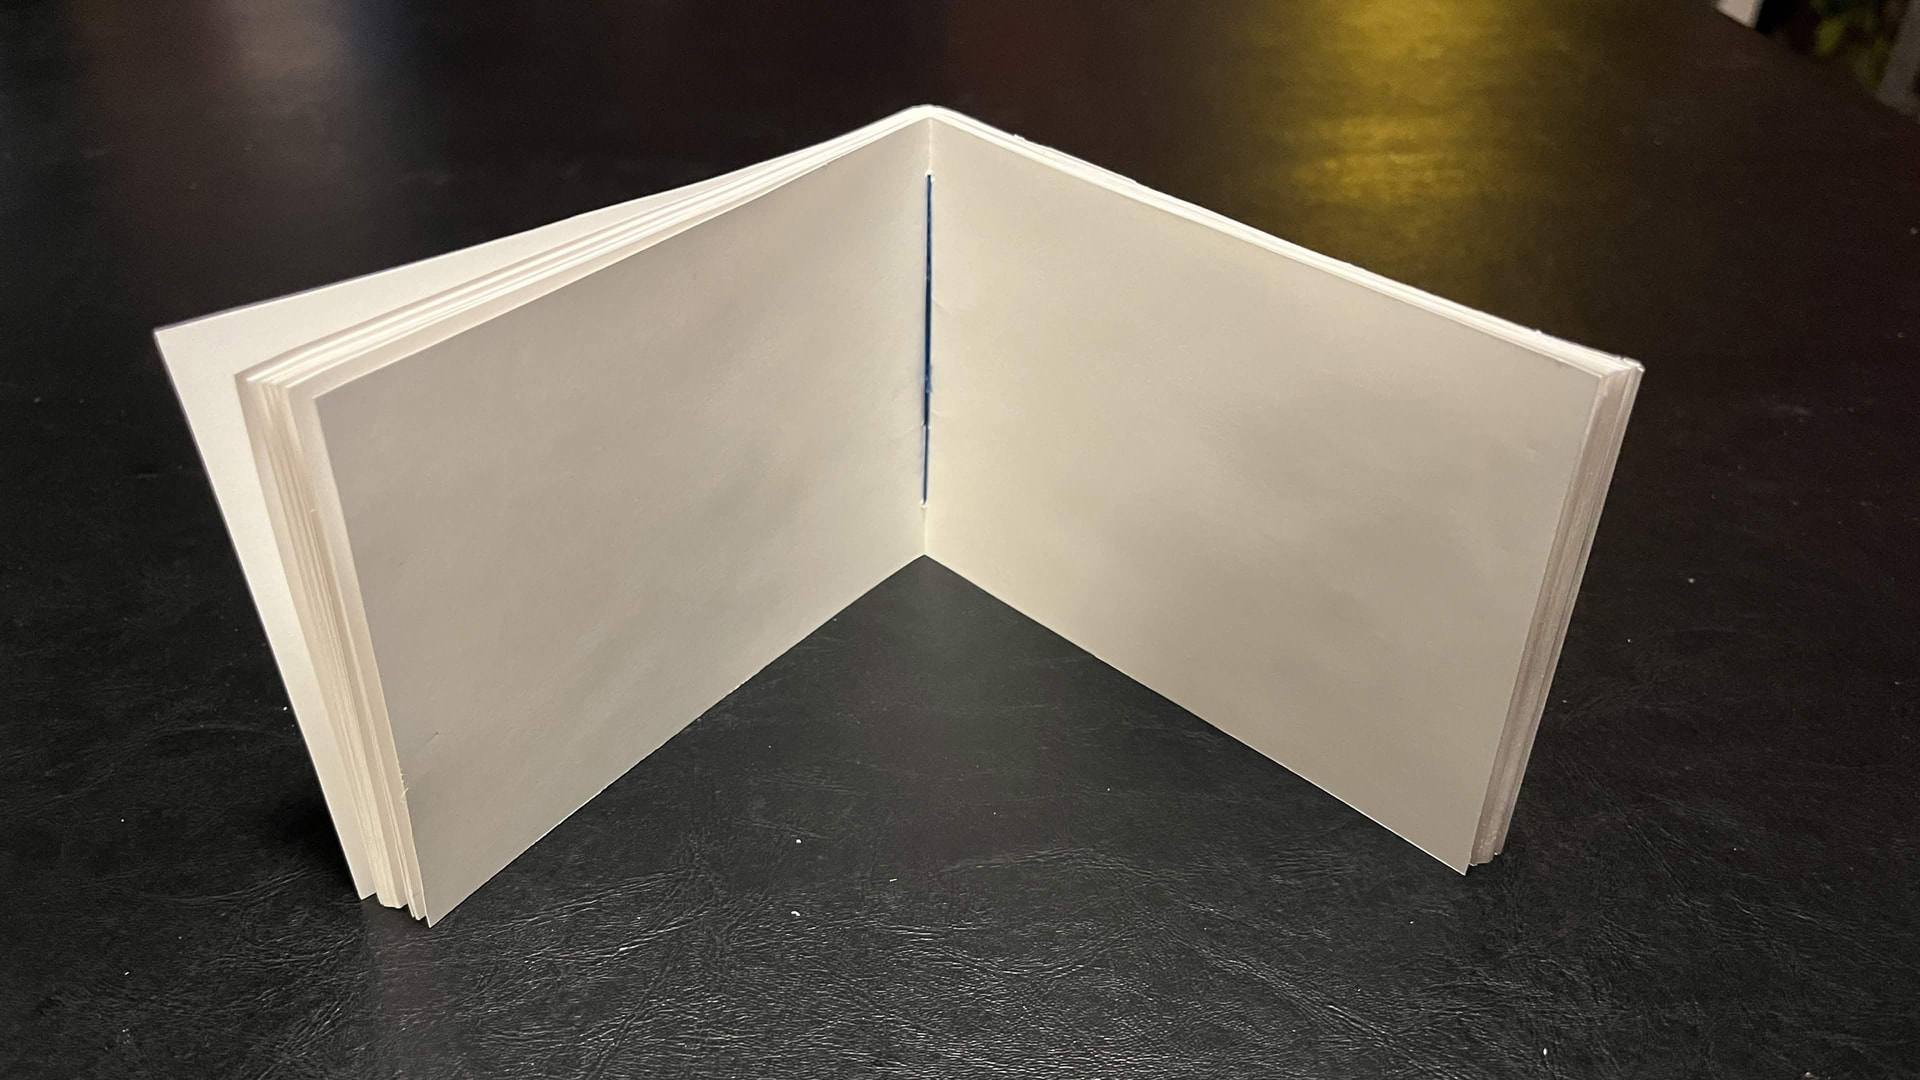
After printing, folding, and stacking all of my sheets I now set them up so they are nice and flush, as pictured above here, figure out where the top and bottom of my book will be and pick out a few points to make holes. (Using thread in place of staples.) This is really cool because you can use fancy thread or match the color scheme of the book, a nice touch.
Using my pin drill (typically used for drilling barrels on guns for miniatures) I make my first whole toward the top, coming down 3/4-1” from where the top will be, then drill my second hole about 3/4” below that.
Then I thread up a needle and make two passes through the two holes, bringing it together on the inside of the book. Making sure that all of the slack is out of the string, particularly on the outside of the cover, I then tie a square knot then trim away the excess.
Now I flip the book on its head and repeat the process on the other side.
Now that the booklet is assembled, I fold it up nice and tight and starting with the outside edge, using a Plastic Ruler (Metal will instantly dull your blade and leave behind metal shavings) and a fresh blade on my box cutter, place the ruler as close to the edge of the cover as possible (to retain as much of it as possible) (EDIT: Below I corrected this. I want to try and cut into the outside edge as much as I can without cutting into critical stuff toward the center of the book like page numbers.) I press the ruler down as firmly as I can and slowly and gently but firm I run passes of the box cutter over the outside edge excess. (That was a hell of a run on sentence.)
Now that I have a nice clean, flush outside edge it should be easy to see where the inside print ends toward the top and bottom, that’s where I want to trim down to next.
Starting with either top or bottom and with the folded edge facing TOWARD (edited) me I place my ruler down as close to the print edge as I can get and do my best to eyeball that the cut is square with the rest of the booklet. Now I repeat the cutting process. The fold can really trip me up so I try to use extra caution there.
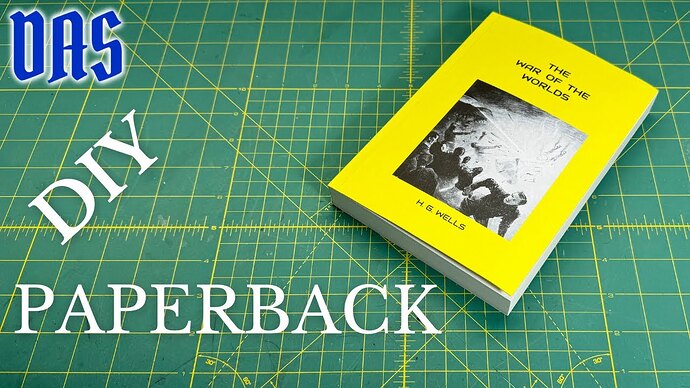
Repeat for the opposite edge and I’m all done! The book pages are easy to flip through just like a professionally manufactured book!
Hope this is helpful to somebody, and fun! XD
Cheers. (And please don’t hesitate to ask questions or give advice!)
3 Likes
Looks incredible. Thanks so much for the detailed walk through. It’s something I’d like to get more into but never find the time and always just end doing a mega basic print.
All this looks so good though, I might just have to try and make the time!
3 Likes
Fun stuff! I have done some PnP stuff, I will see if I can find something worth sharing.
For something PnP-adjacent:
If you’ve ever thought about making inserts and storage-y stuff but don’t want to use a 3D printer to make microplastics go “BRR!!” you might have a look at my Widgets™ here in the forum to see some stuff I have made with cardboard. More to come there.
2 Likes
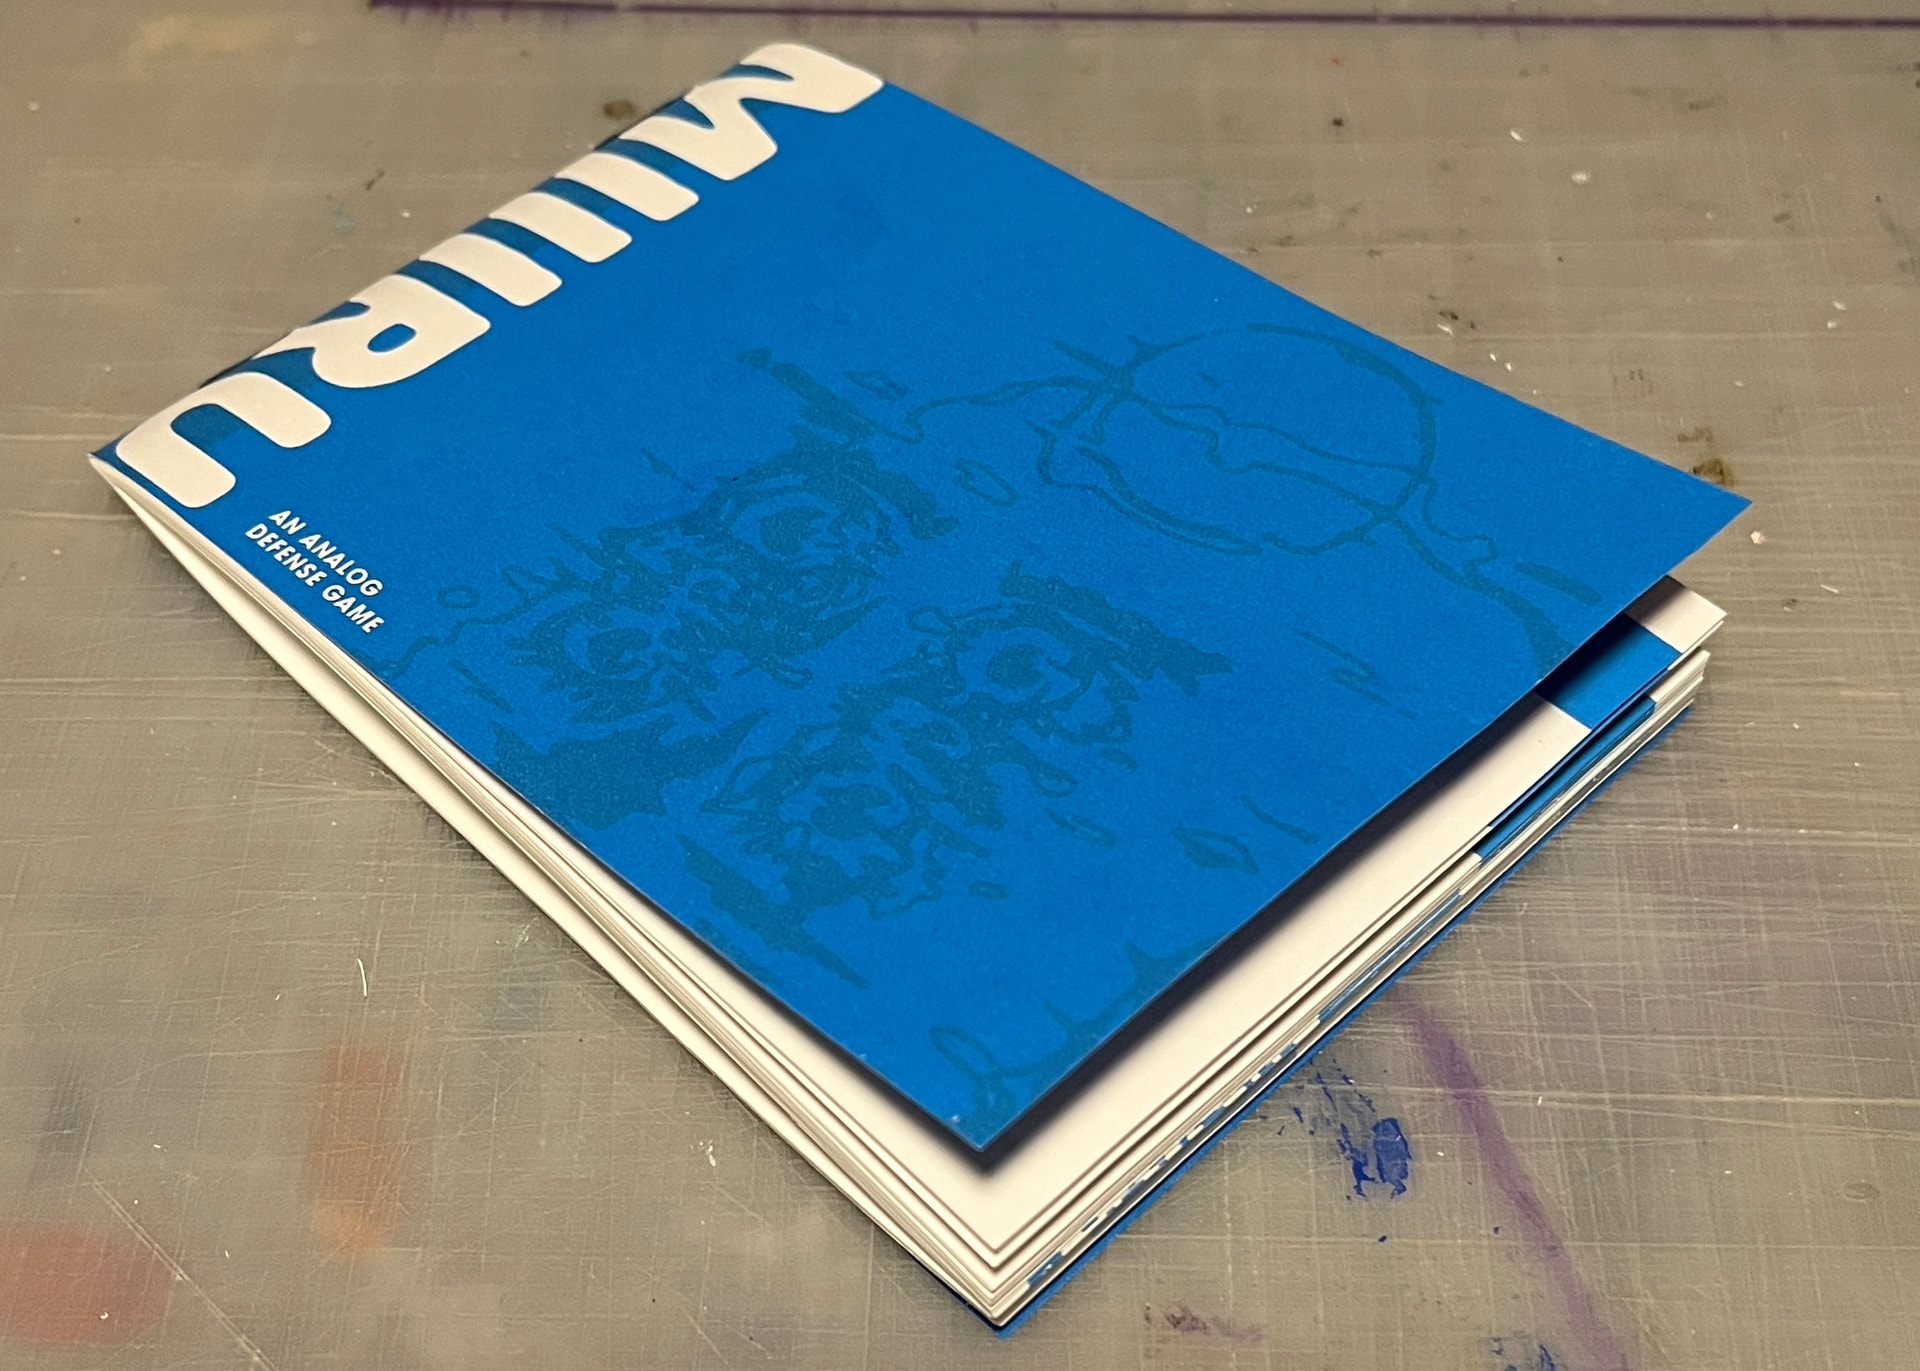
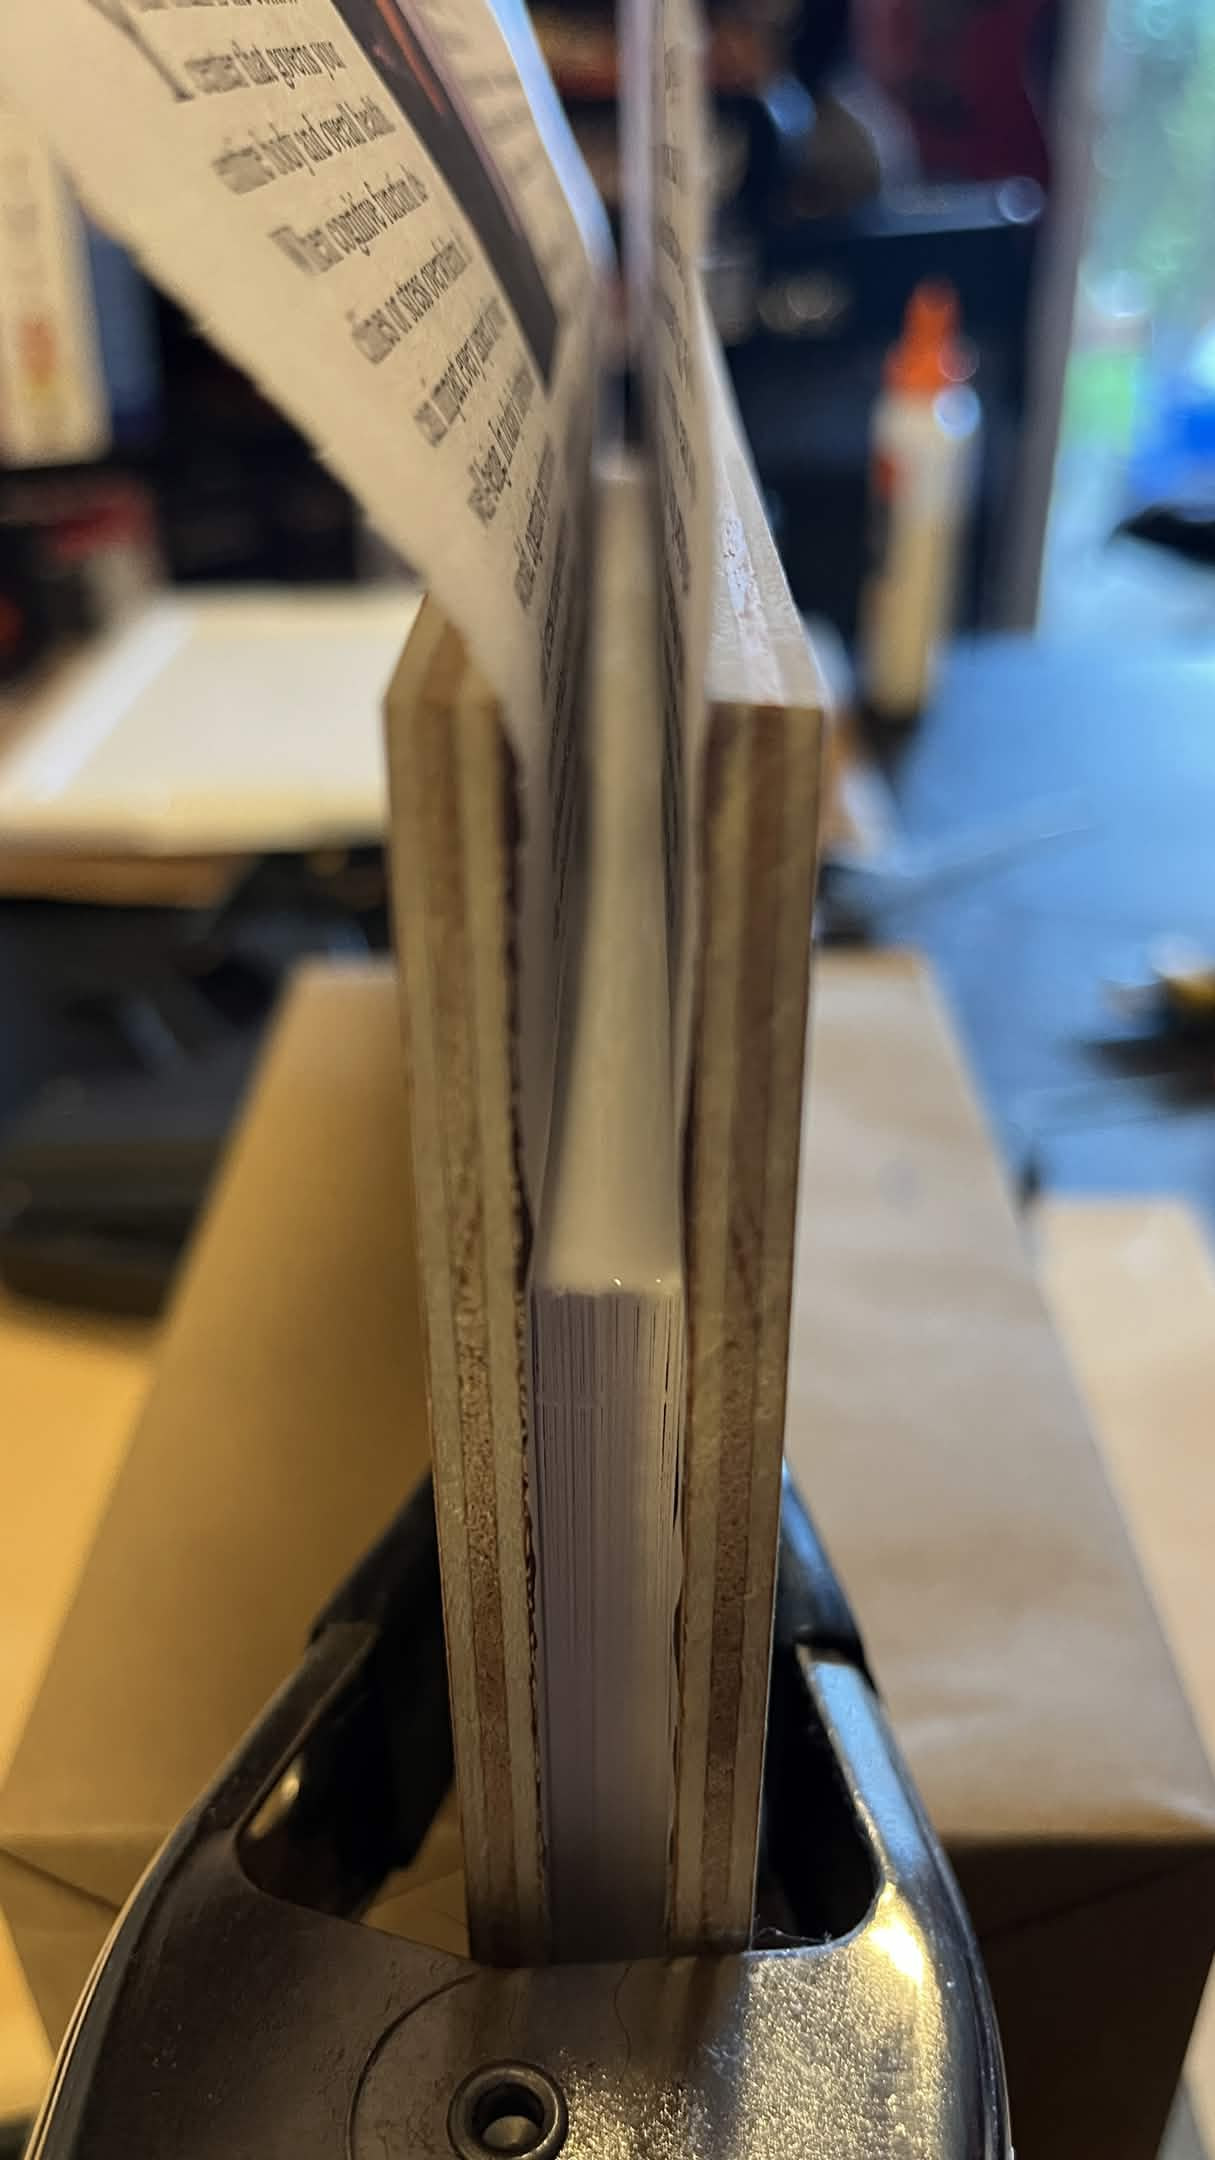
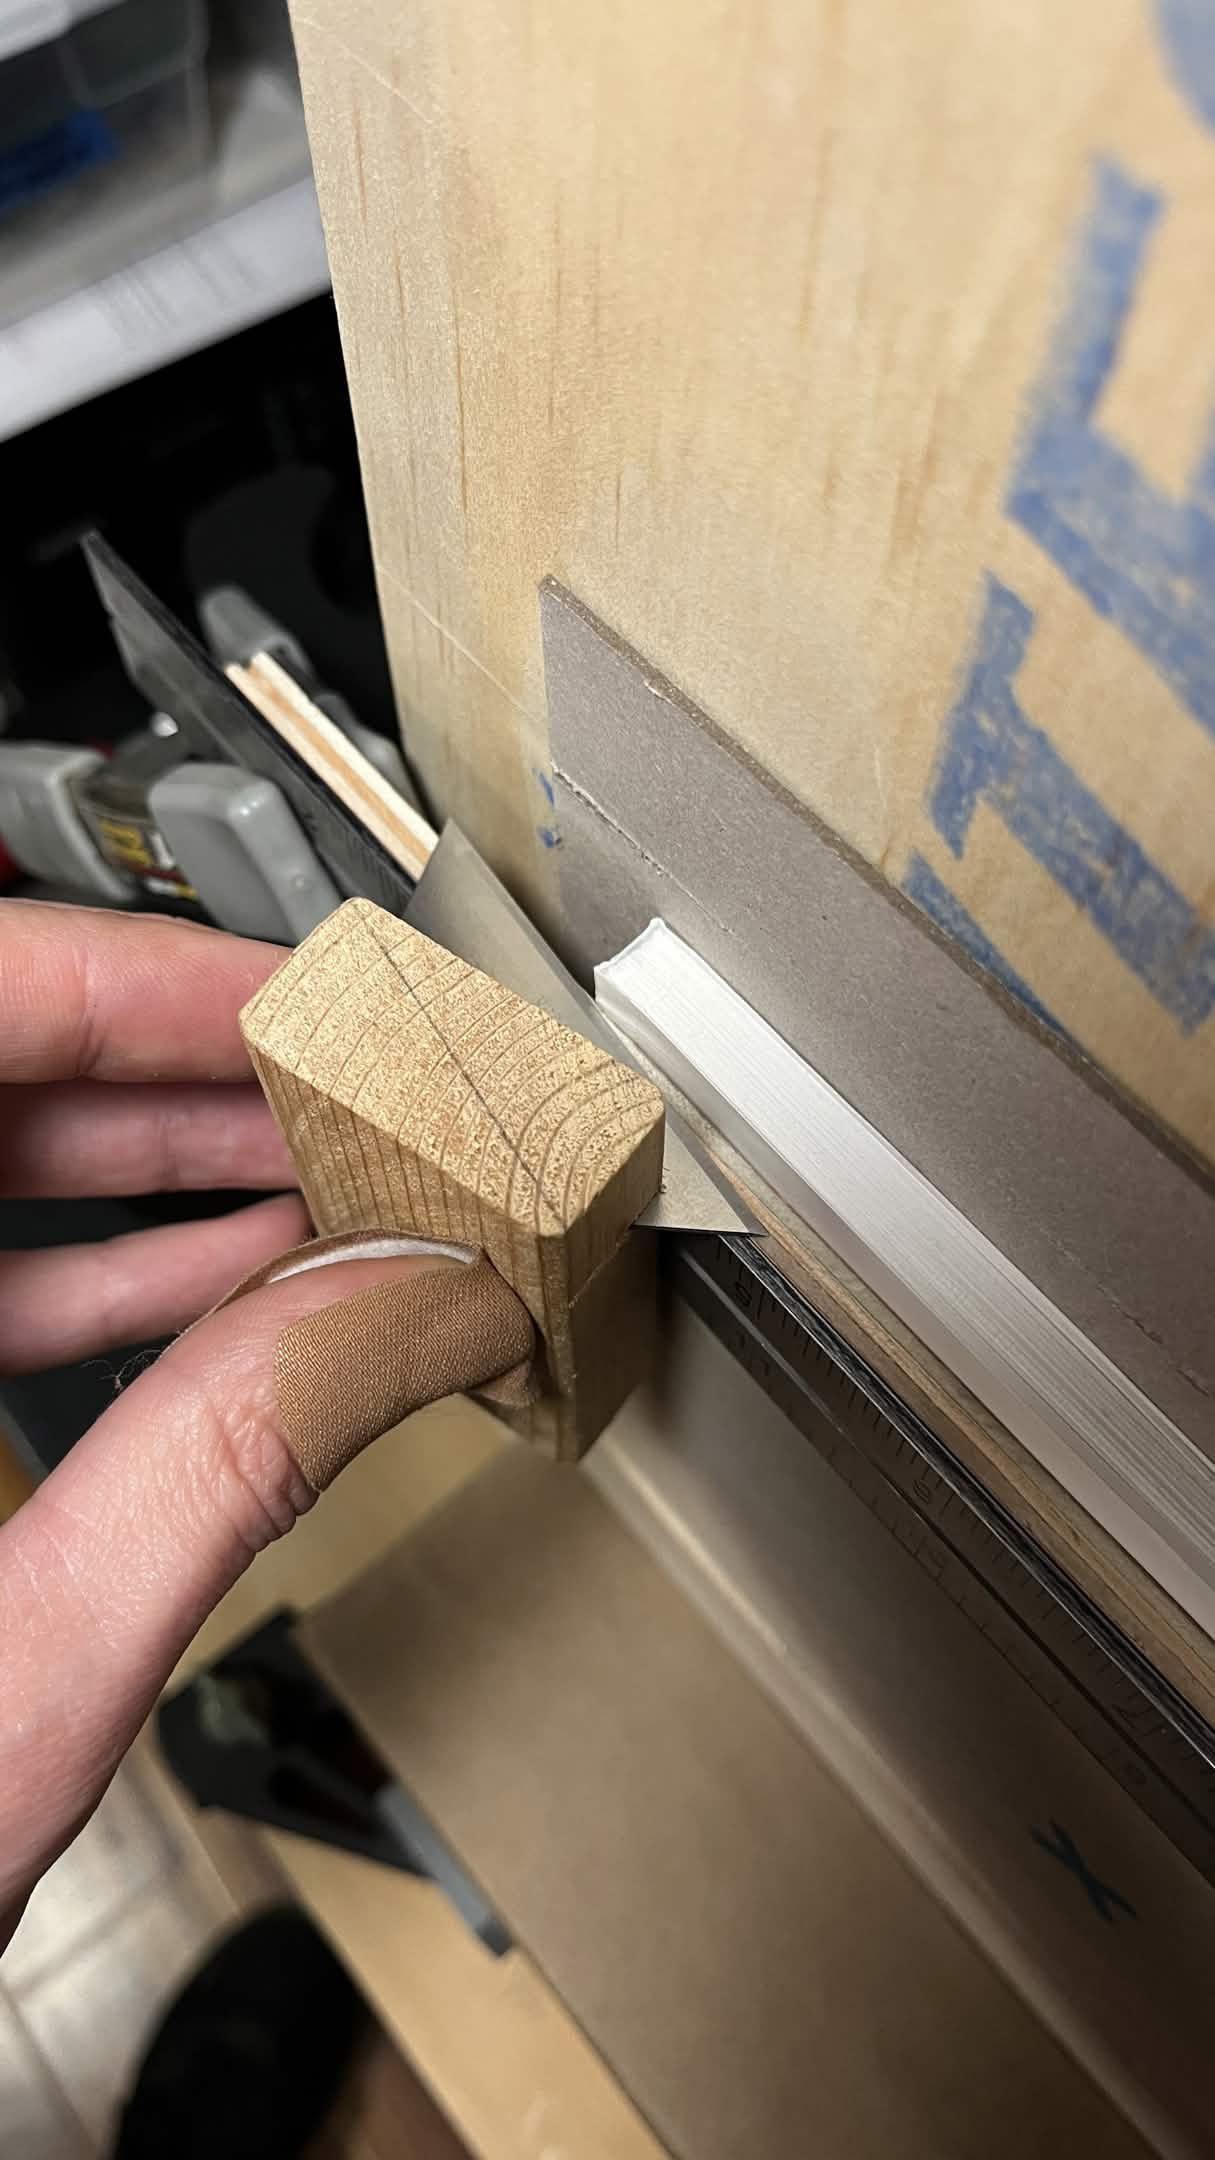
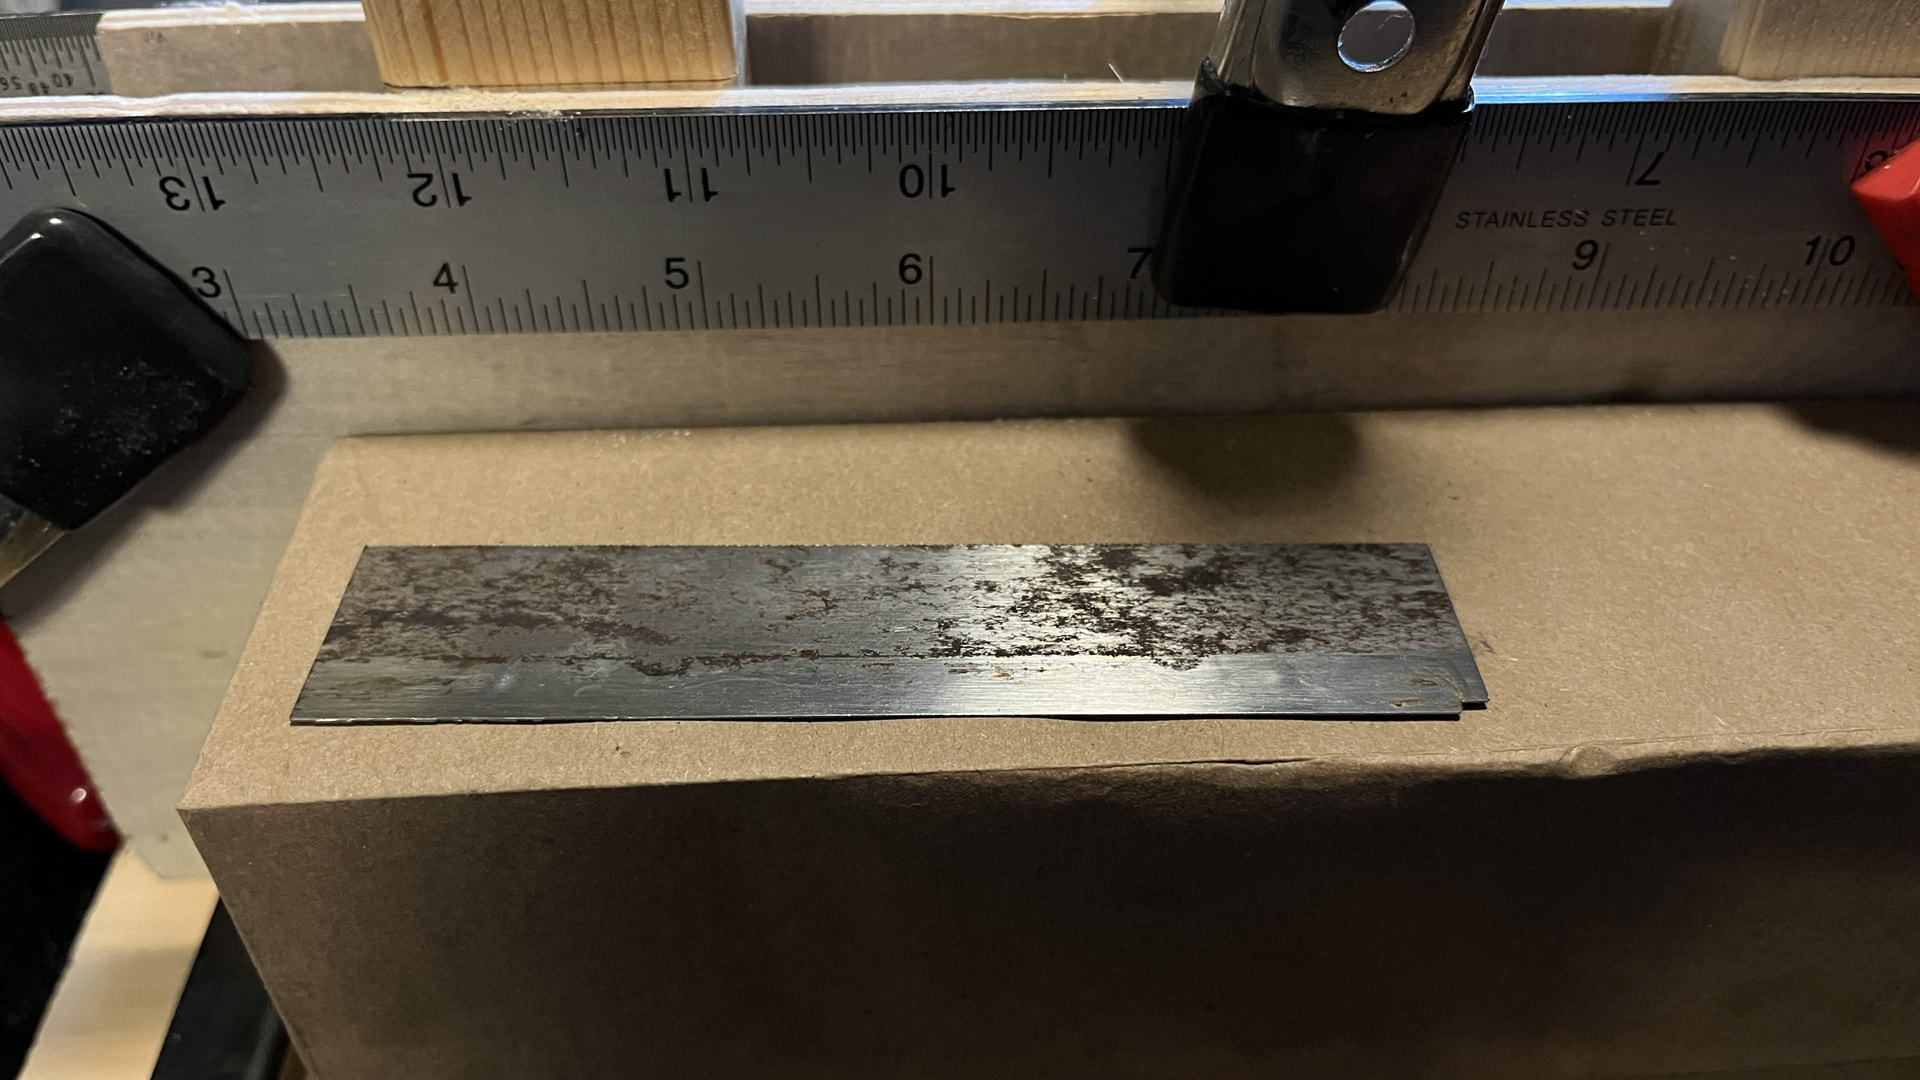
I realized that I missed a step, probably because it’s a newer one and I forgot about it.
The image here shows how far I should/would cut into the outside edge of the cover and why having too many pages in a single signature doesn’t work.
I don’t just cut up to the very edge of the cover any more, I cut into it.
It depends on the book but in this instance I would cut out the page numbers toward the center if I trimmed all the way to the inside edge of the first page.
At this point I can decide what I want to do, either cut in and then hand write all the missing numbers, or just leave it. (Or somewhere in-between.)
I think I am just going to leave it. My next project I am planning on doing multiple signatures and I will have to come up with my own formula of exactly how many sheets per signature works with my particular paper, which is 32 lbs.

1 Like
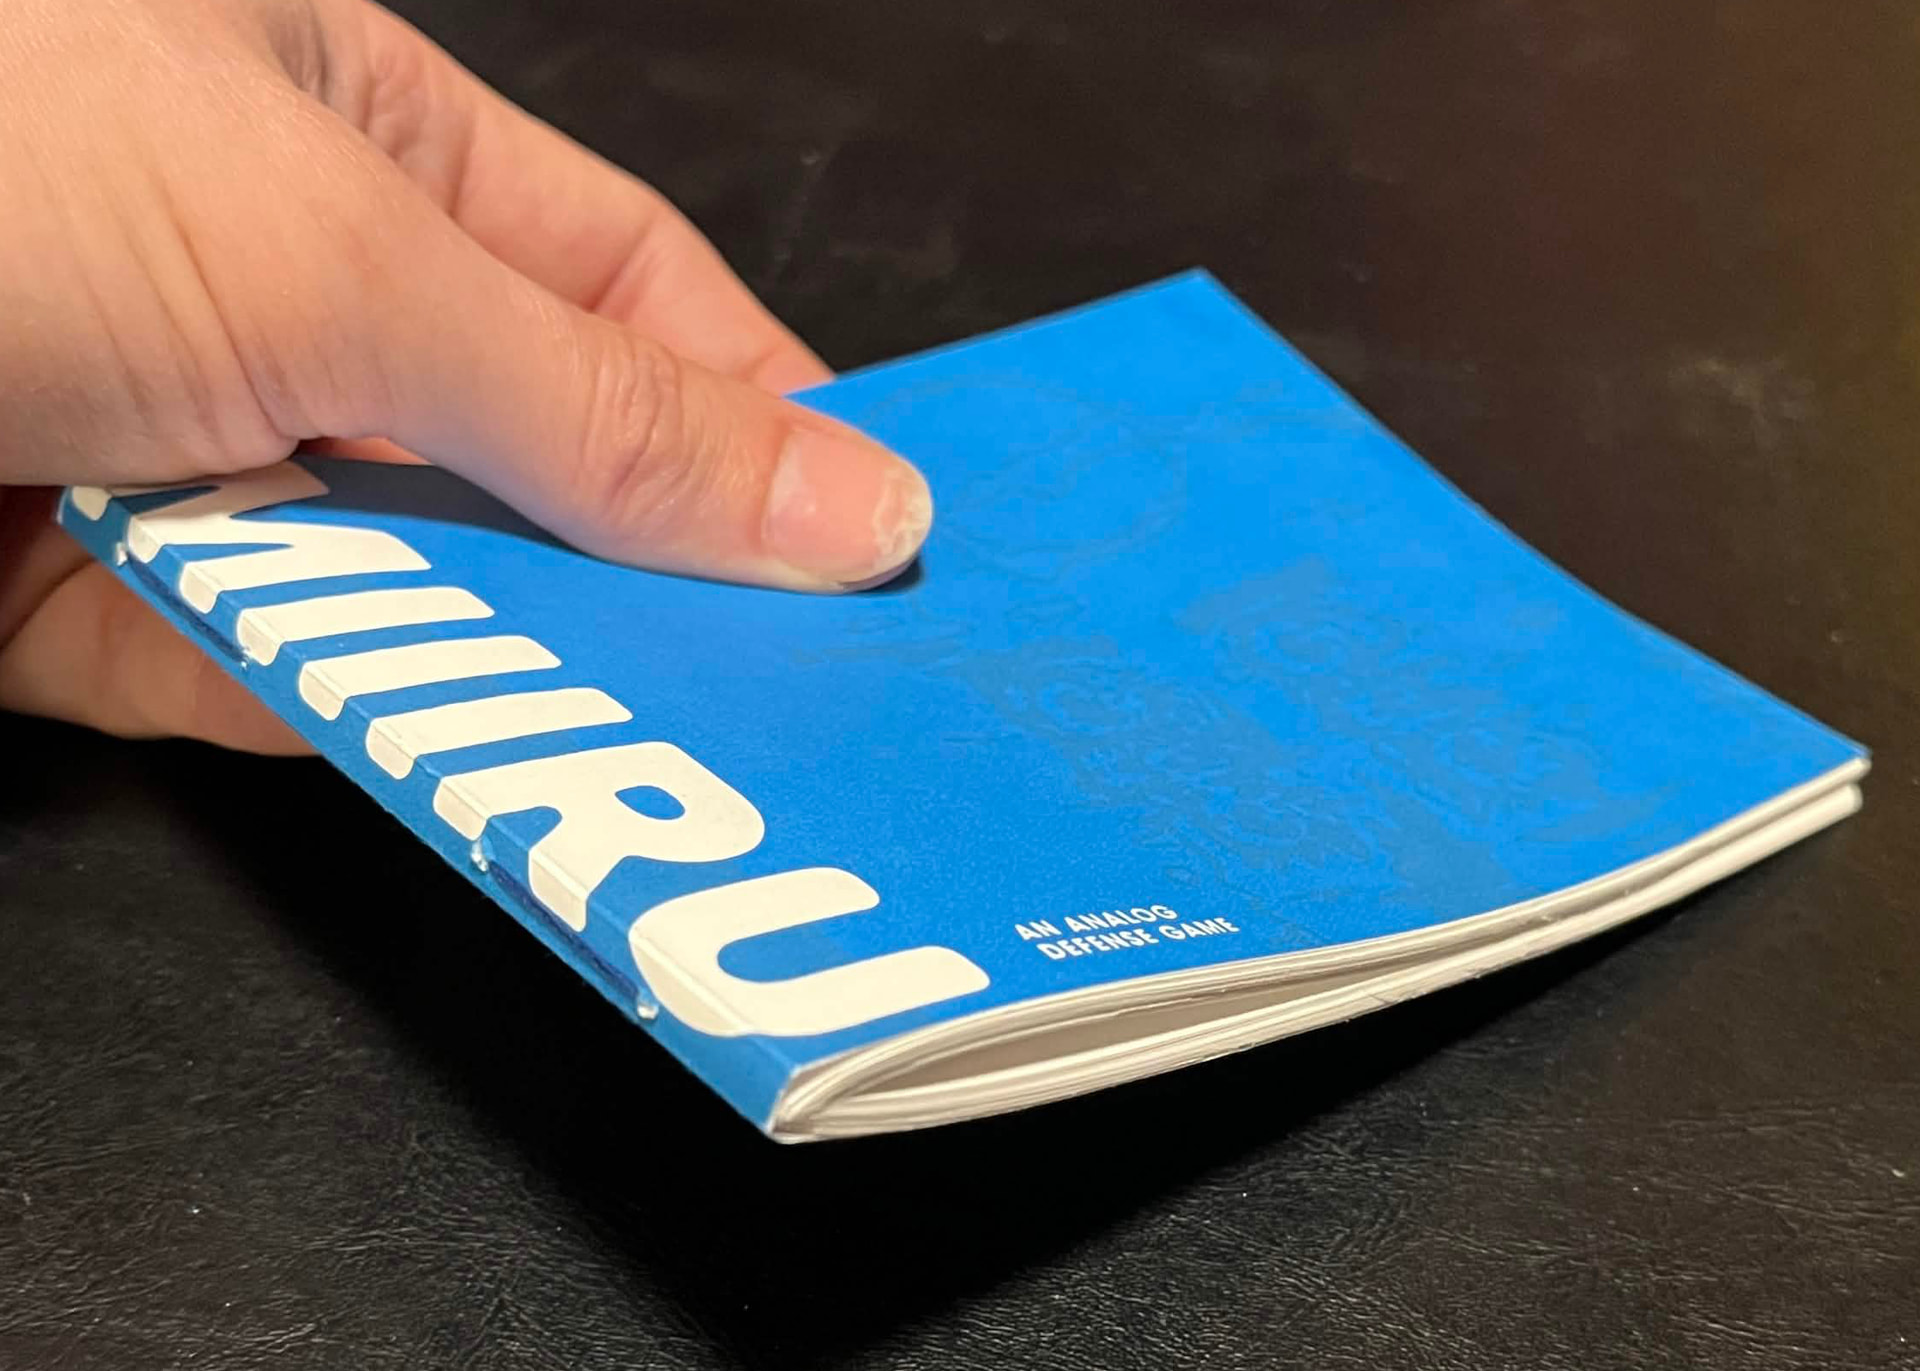
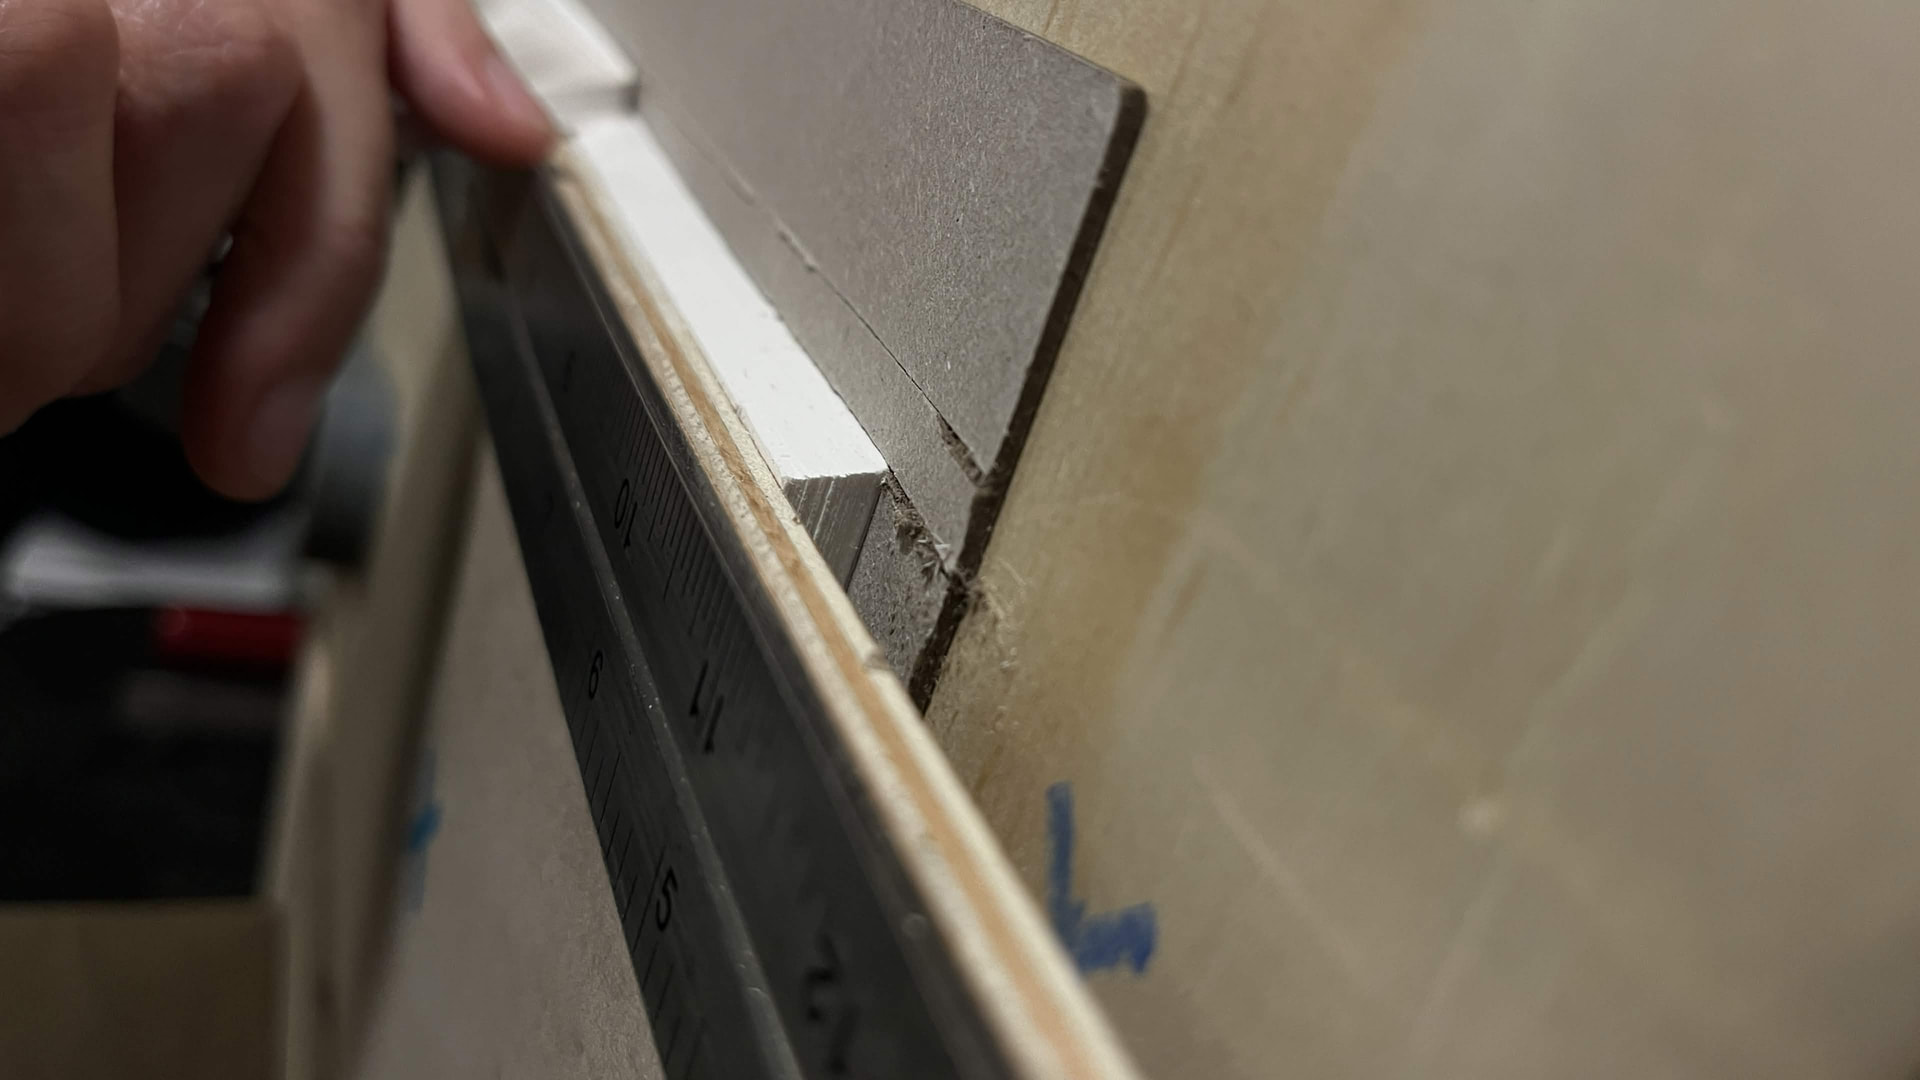
I did end up cutting into the cover more.
Also I made an edit above in my step by step guide. I want to have the fold facing TOWARD me, other wise there is a large margin for error. I actually gouged the top edge pretty good with this one but did it the new way on the bottom edge and it turned out perfect.
Learning learning.
2 Likes
This is an incredible resource.
2 Likes
I have spent many an afternoon listening to this gentleman:
3 Likes
This all looks really nice! Well done.
1 Like
Wonderful, thanks for sharing! Looks like they also do box making which I also want to get into so I can make custom book… I don’t know what to call them. So I can slide my PnP books into decorated containers. Book Sleeves?
For something like this, where the ends show.

3 Likes
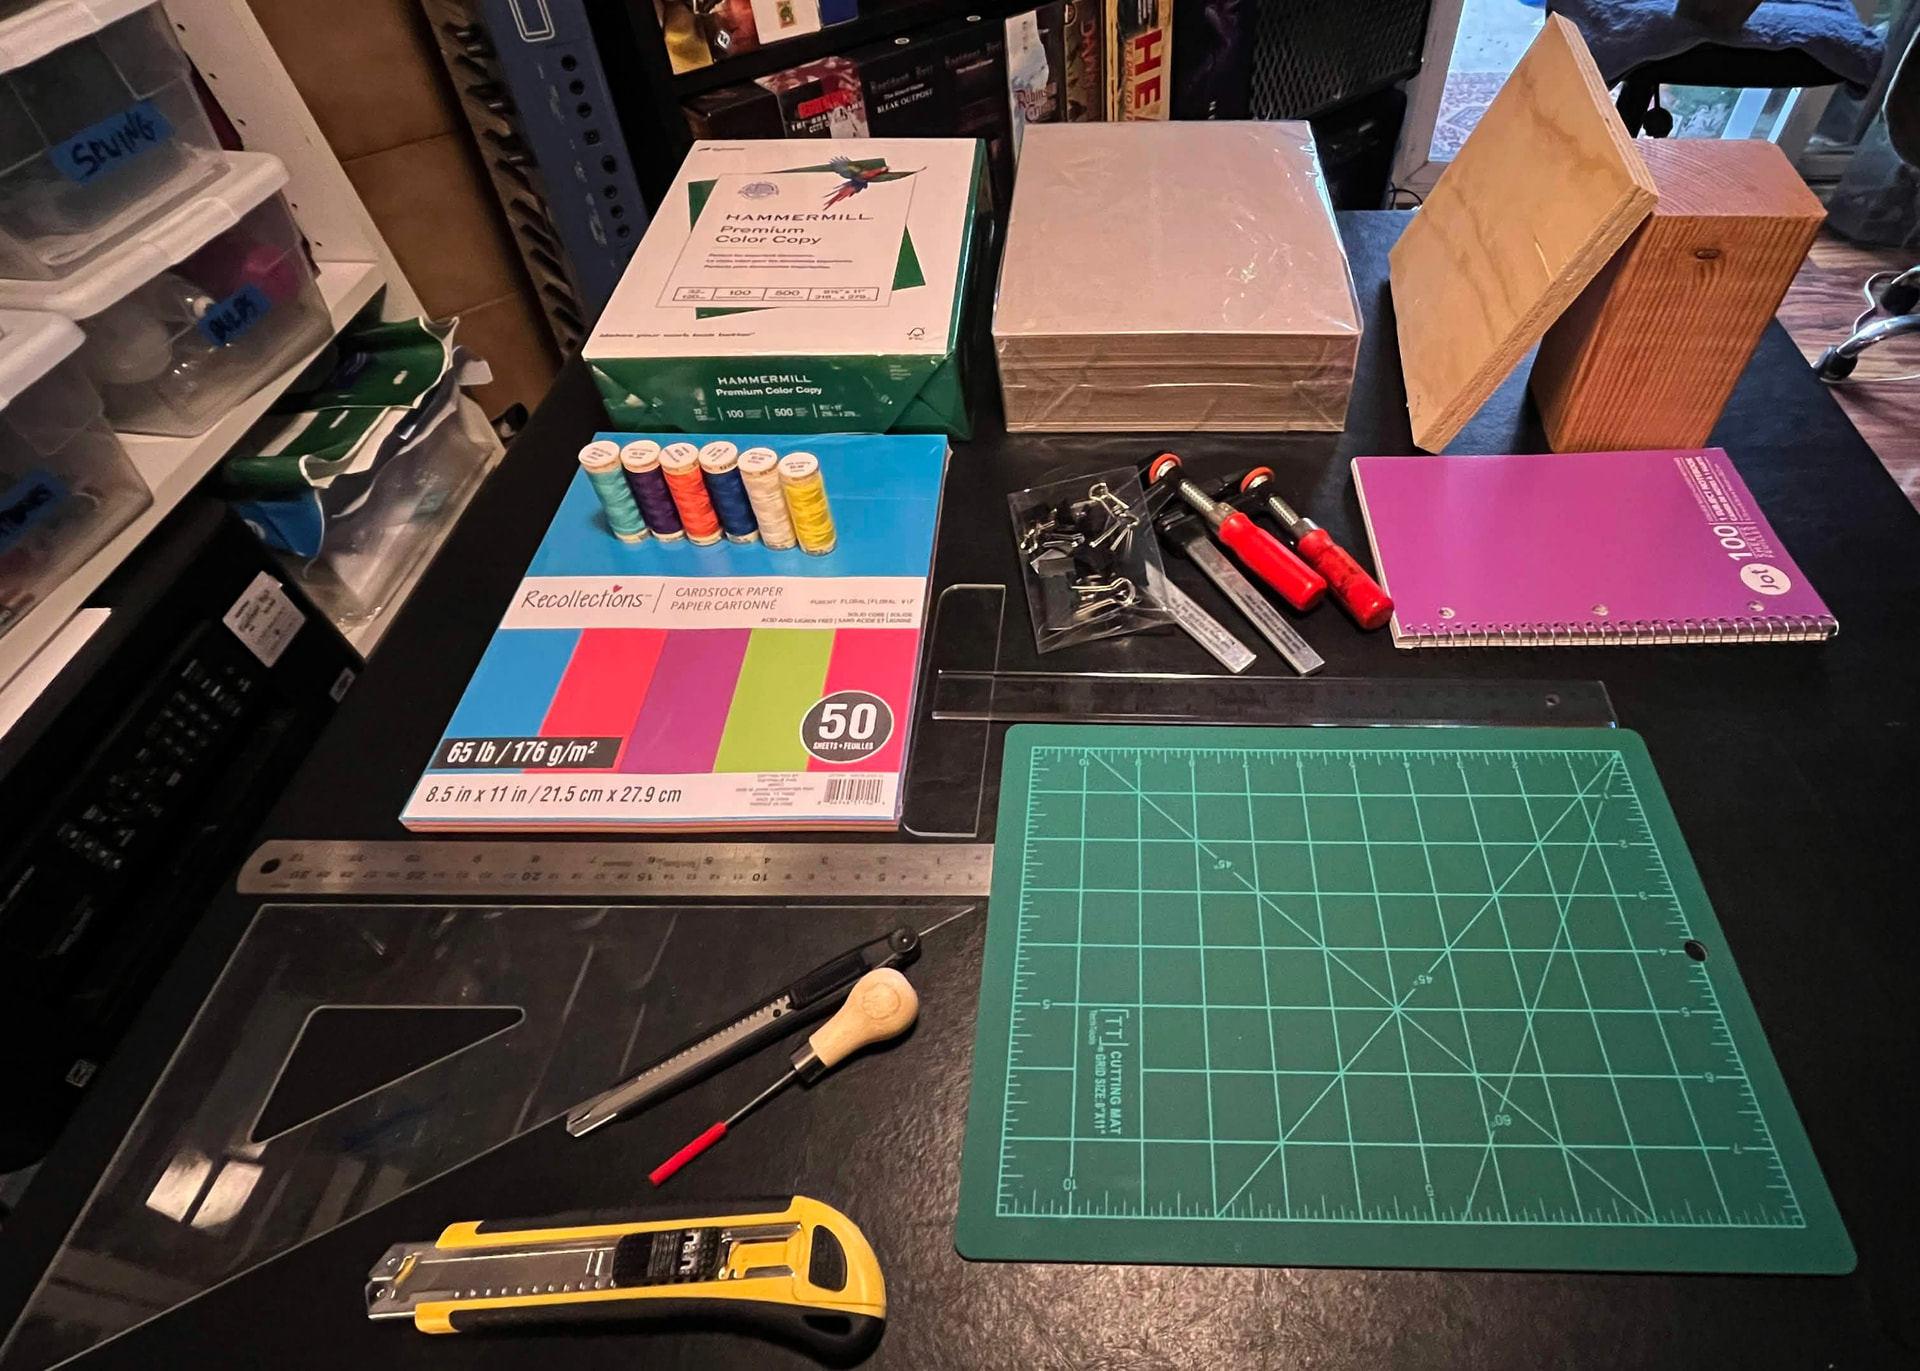
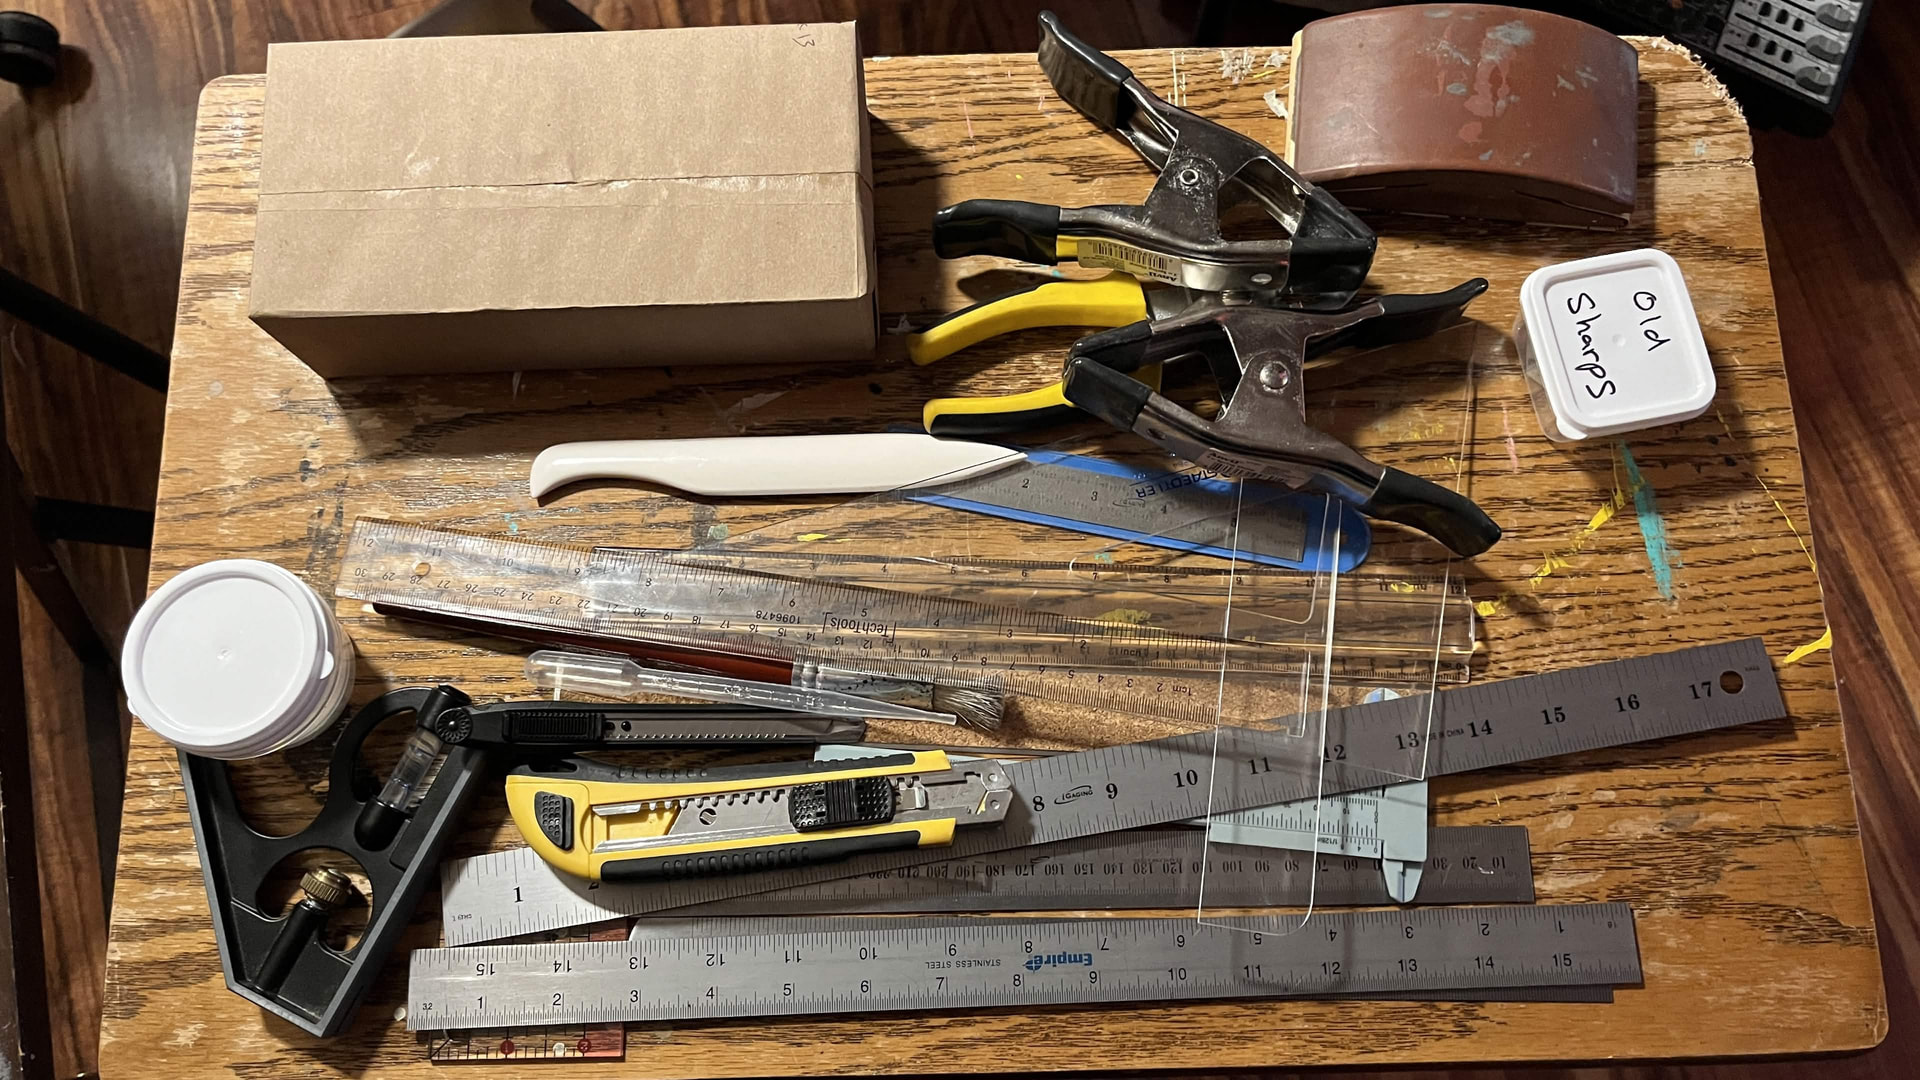
I got all kinds of new tools to play with today!
Especially excited for the Awl and to make a Book Cradle. (Hopefully.)
3 Likes
I tried out this idea last night, a fake square bind. It didn’t go great but I would do better if I tried again.
I used this to use up an extra print of the MIRU3 cover. I decided to make a field sketch book for my games. This is so I can make drawings for my journal in the game! I was really inspired by My Side of the Mountain when I was a kid, it had his sketches of various inventions the main character designed inside.
2 Likes
I am planning to try my first “perfect bound” equivalent book shortly.
Even though I much prefer to stich, this will allow me to make substantially larger books at home until I invest in a larger format printer.
Here is my source: There’s no preview but the link works. =)
1 Like
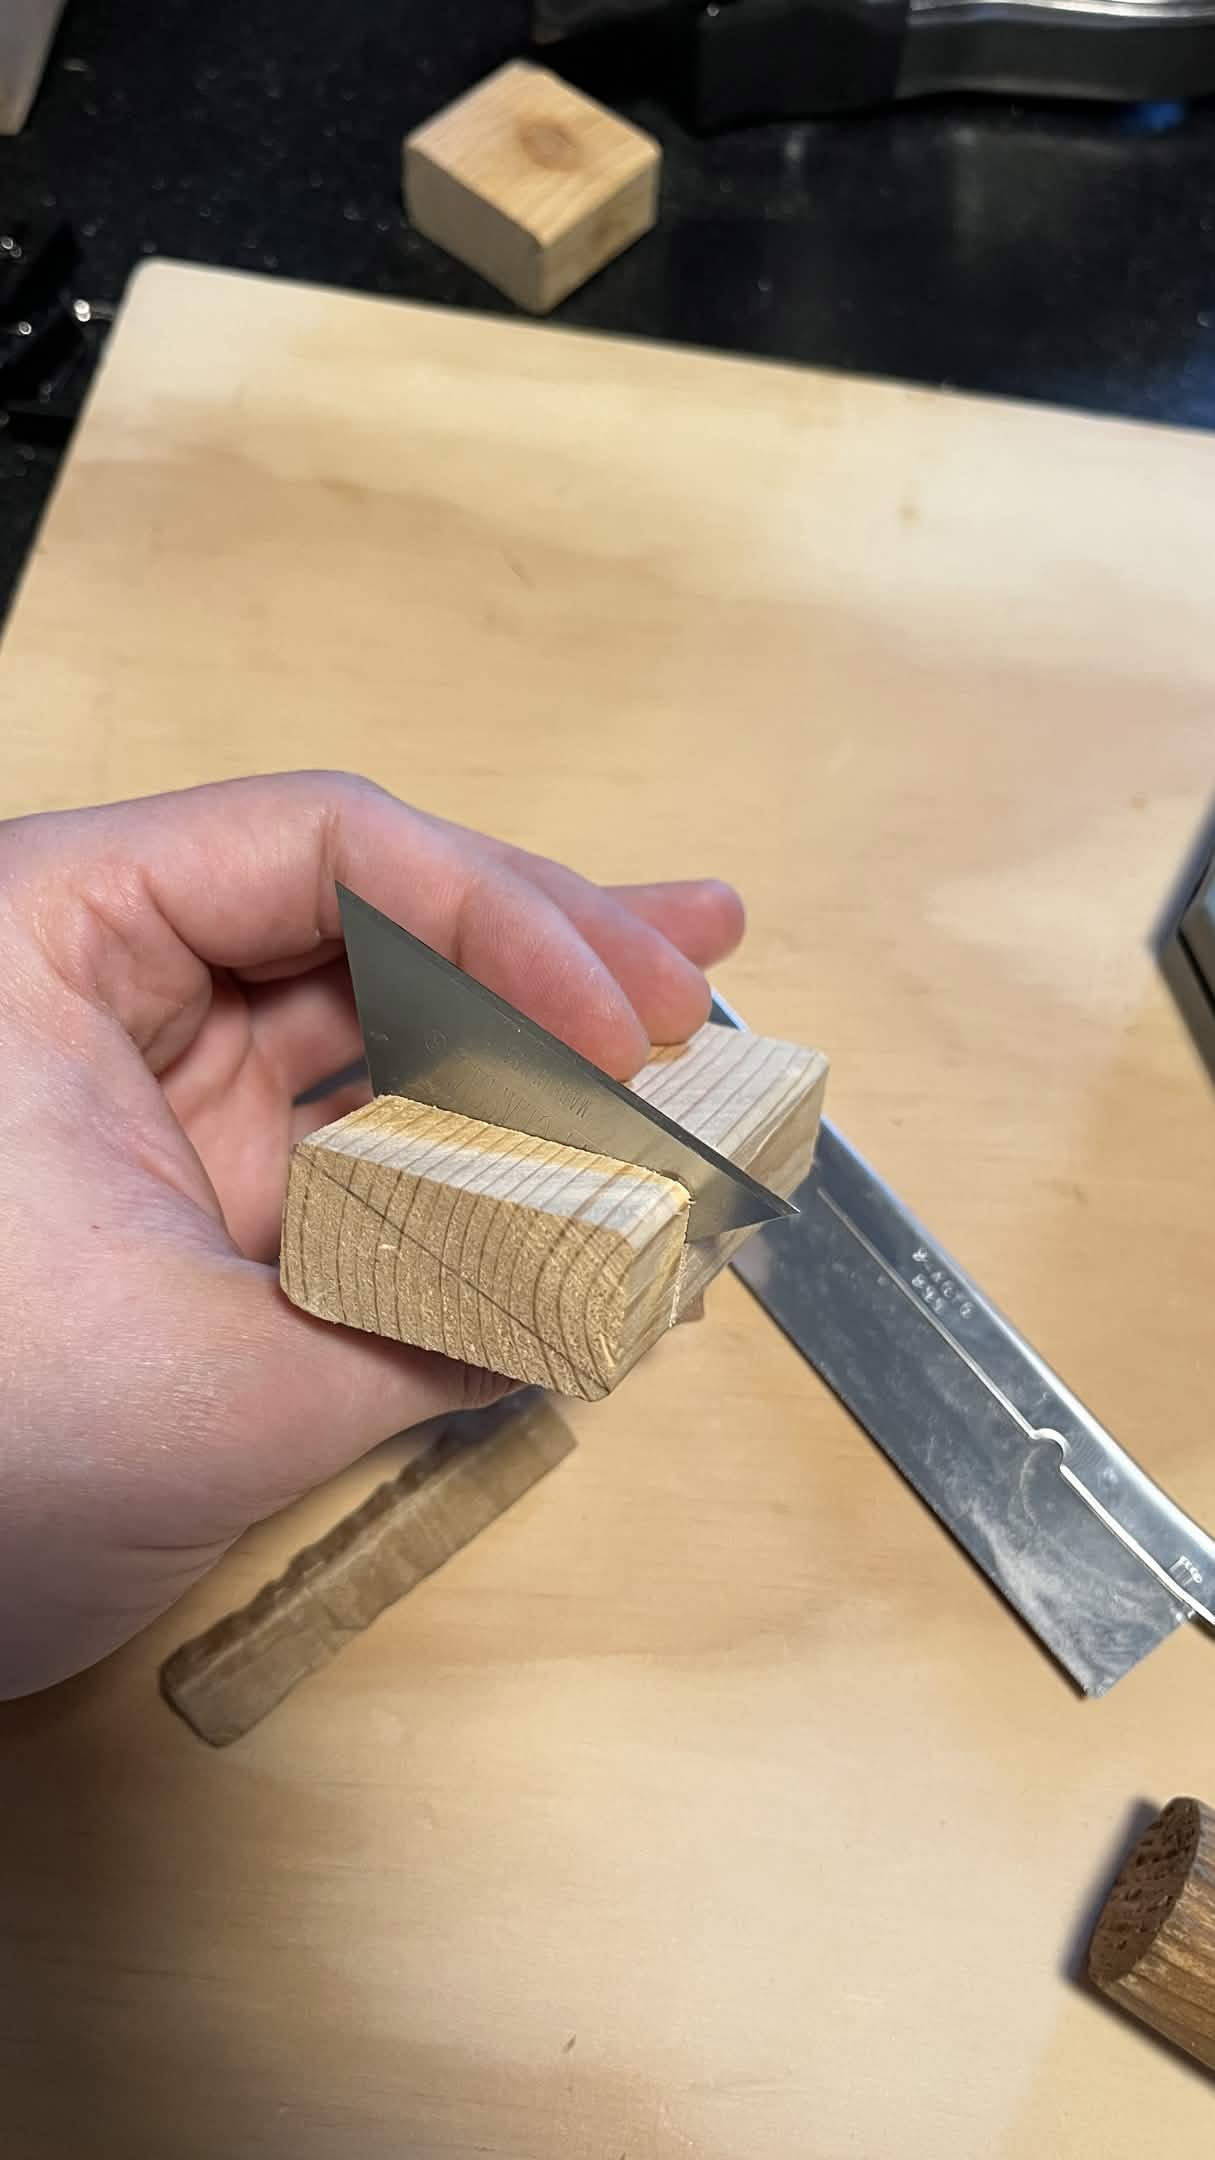
Step 1. Make bricks.
Somebody just upped their wrapping paper game!
Loving utilizing these tools. My Staedtler Triangle was purchased 25 years ago in case I ever needed it. I’ve done that a lot with great success. First time I’m using it, to make the 90° and 45° folds.
1 Like
2 Likes
This video gave me enough ideas to come up with a jig with what I have laying around.

This is what I pulled together:
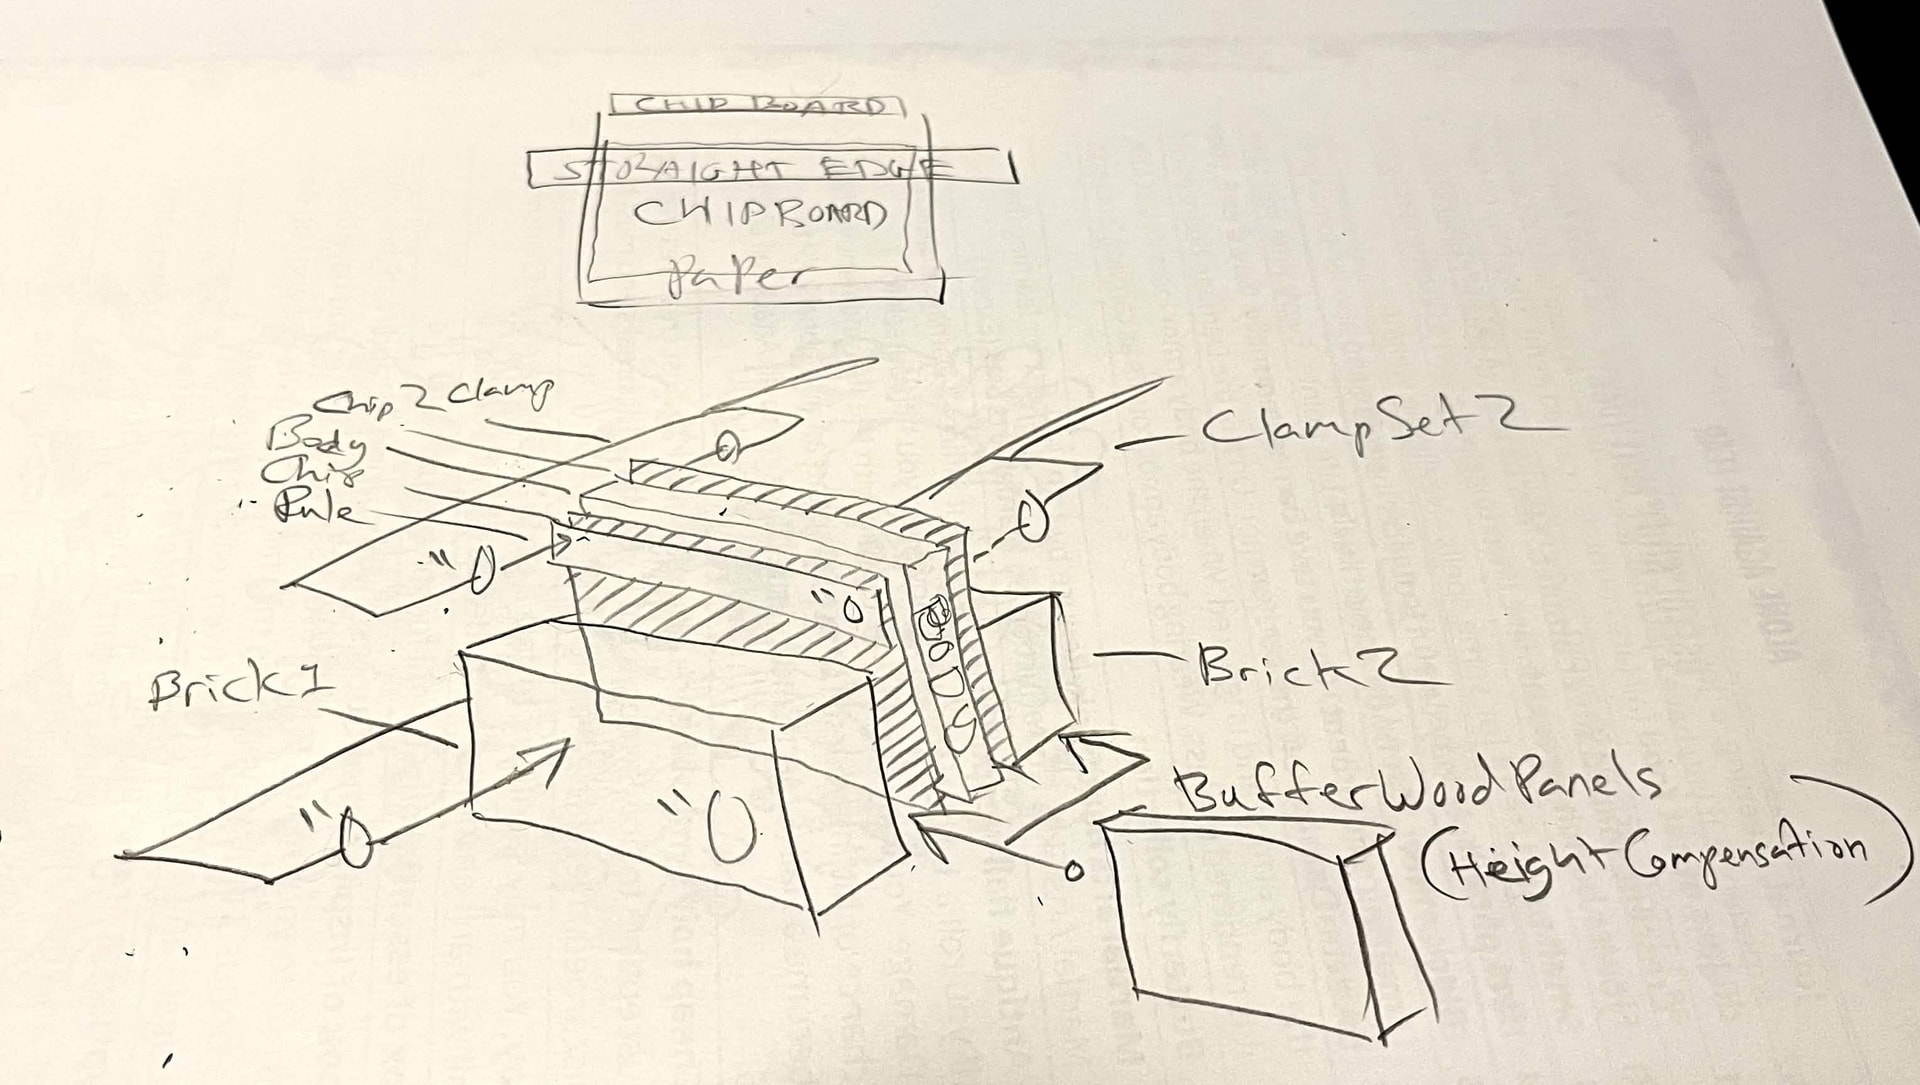
I will find more permanent pieces later, I just want to finish this damn book!
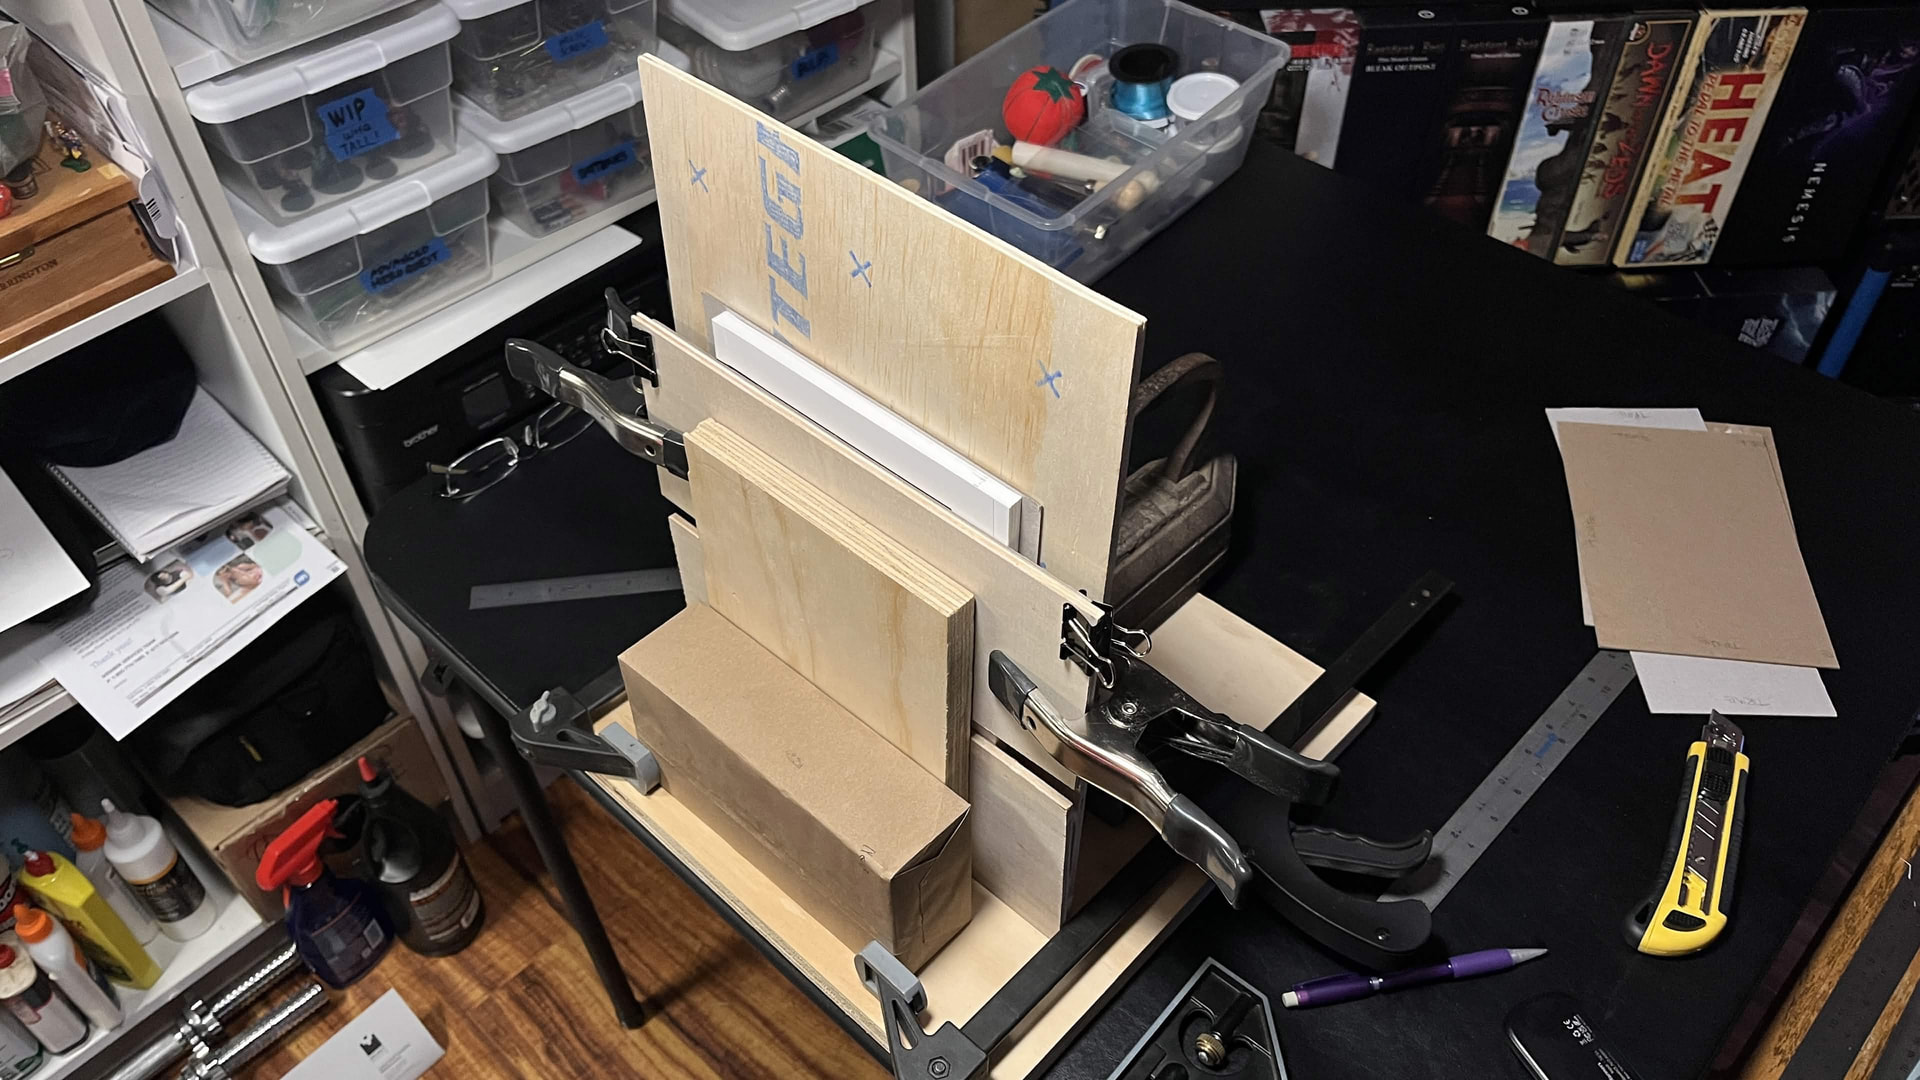
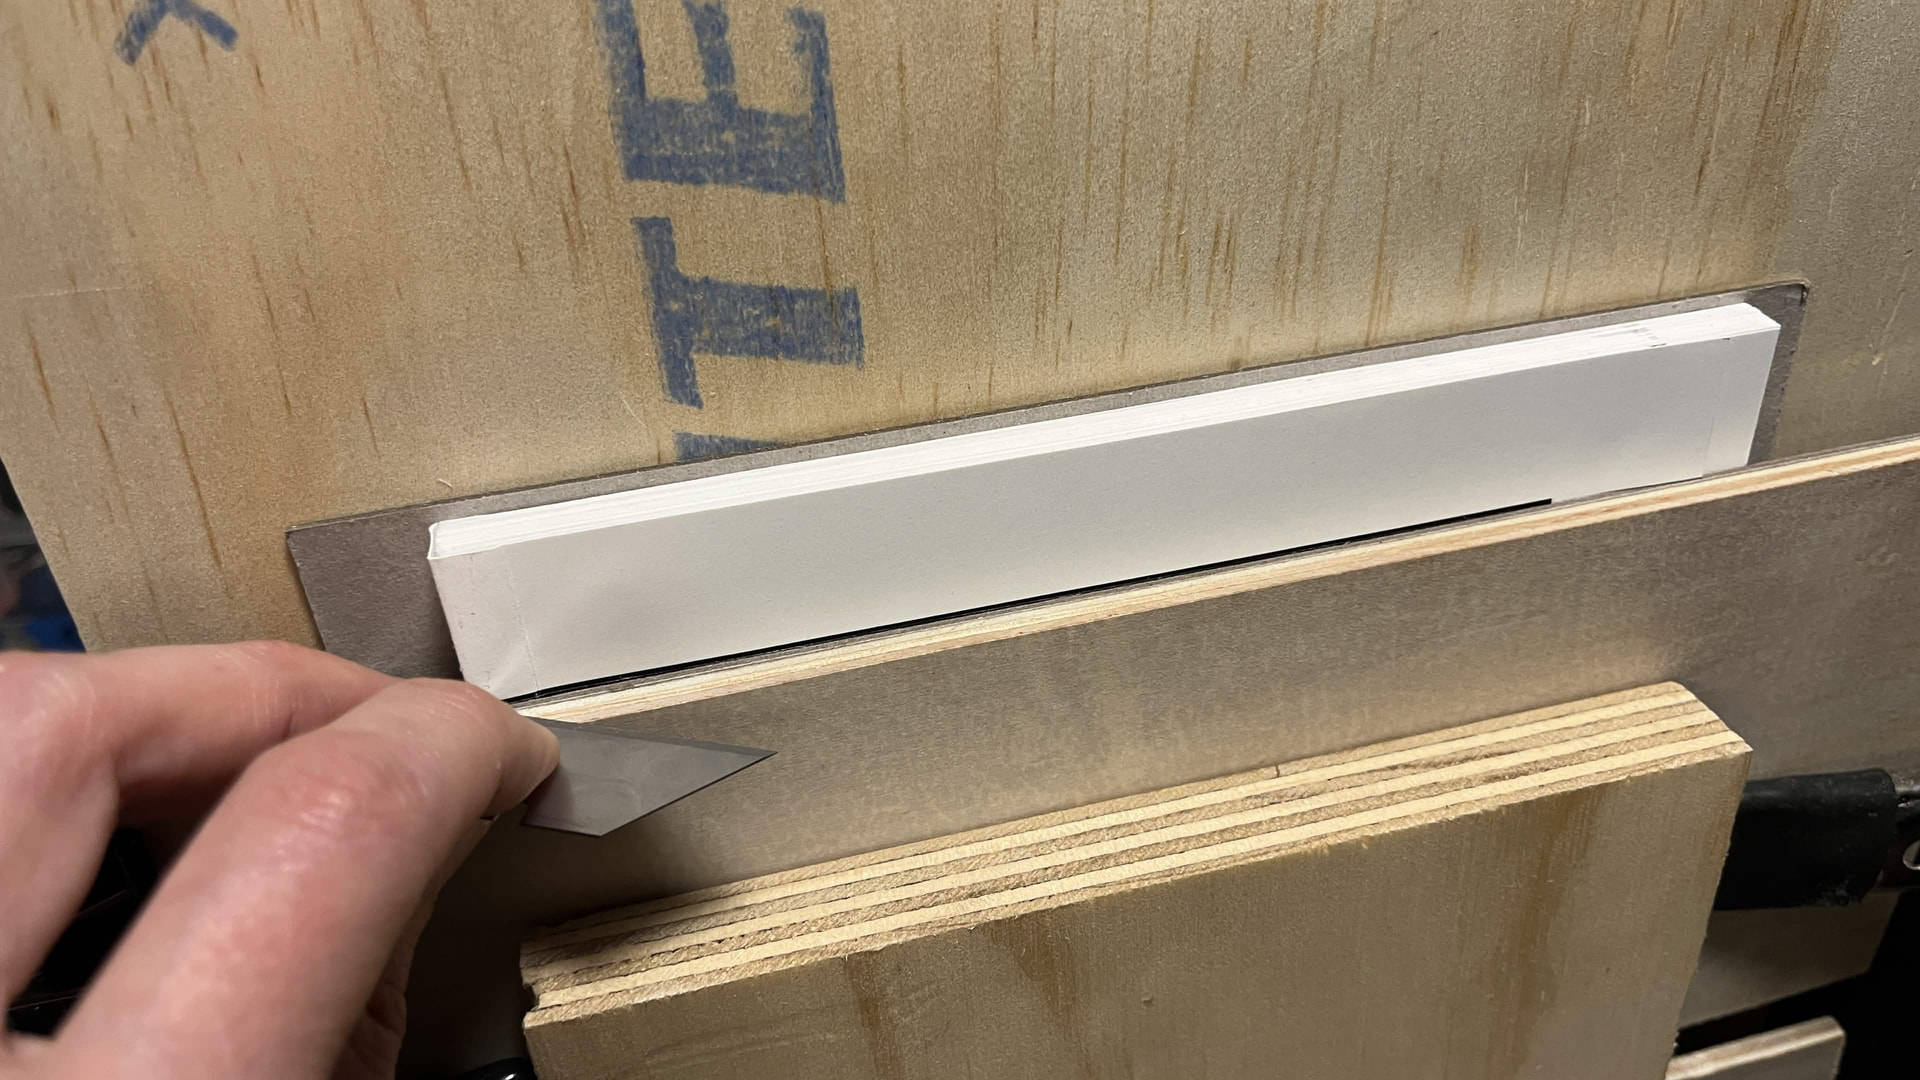
I’m using my blade like a chisel here as best I can.
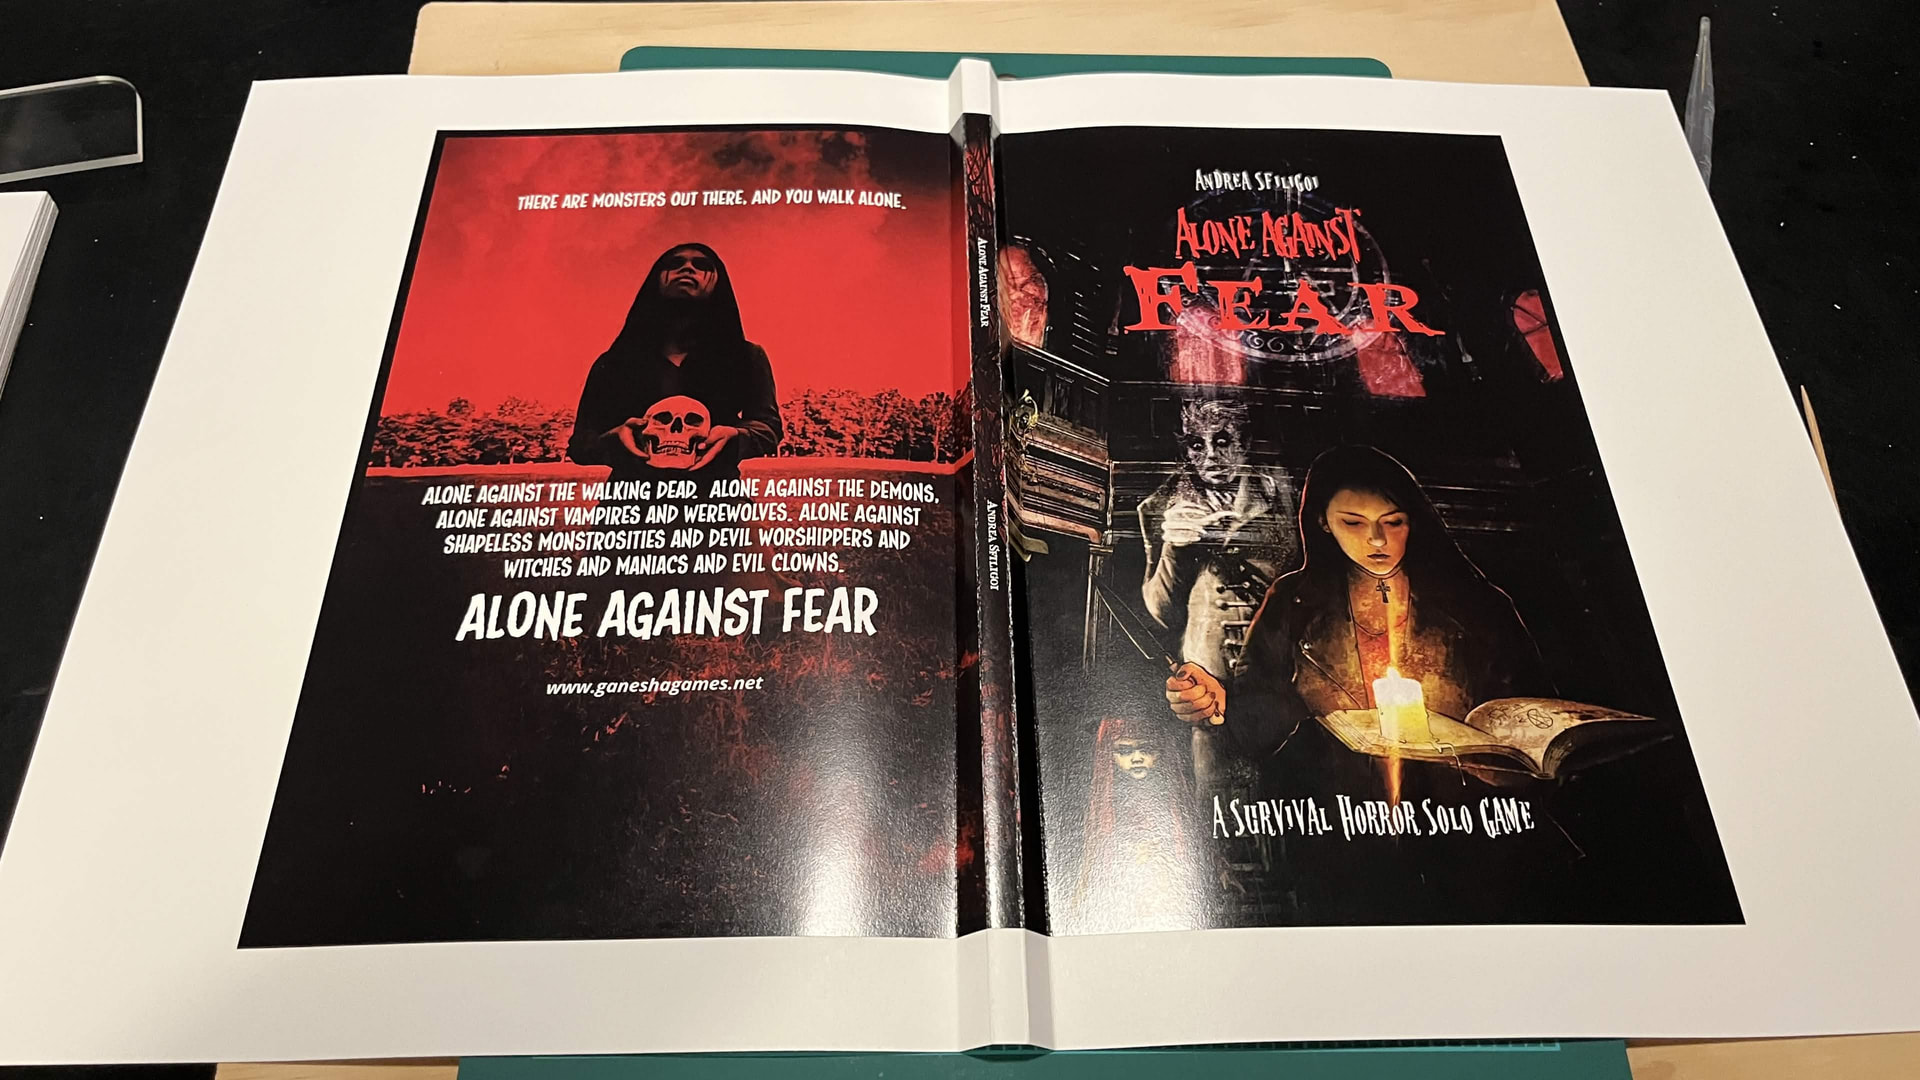
Also Here are some shots of the progress on my first paperback. One hard lesson was I didn’t consider paper weight and how that would technically alter the width of the book. I wanted to use the best paper at 32 pound but I think I have learned through a round about way that paperbacks generally use 28 pound. (Or maybe less but I doubt it.)
This is the gluing of the spine.
The spine ended up overwide by about 1/16” so I am going to under trim just the cover so I don’t have to cut into the body and ruin the layout aesthetic, nor will I have a big ugly white stripe on the outer edge of the cover.
Now somebody please let me know if this is consider spamming at this point. My hope is that this would give insight and help inspire. <3
3 Likes
Totally not spamming. I don’t know anything about book binding but I’ve been following this whole thing with interest!
2 Likes
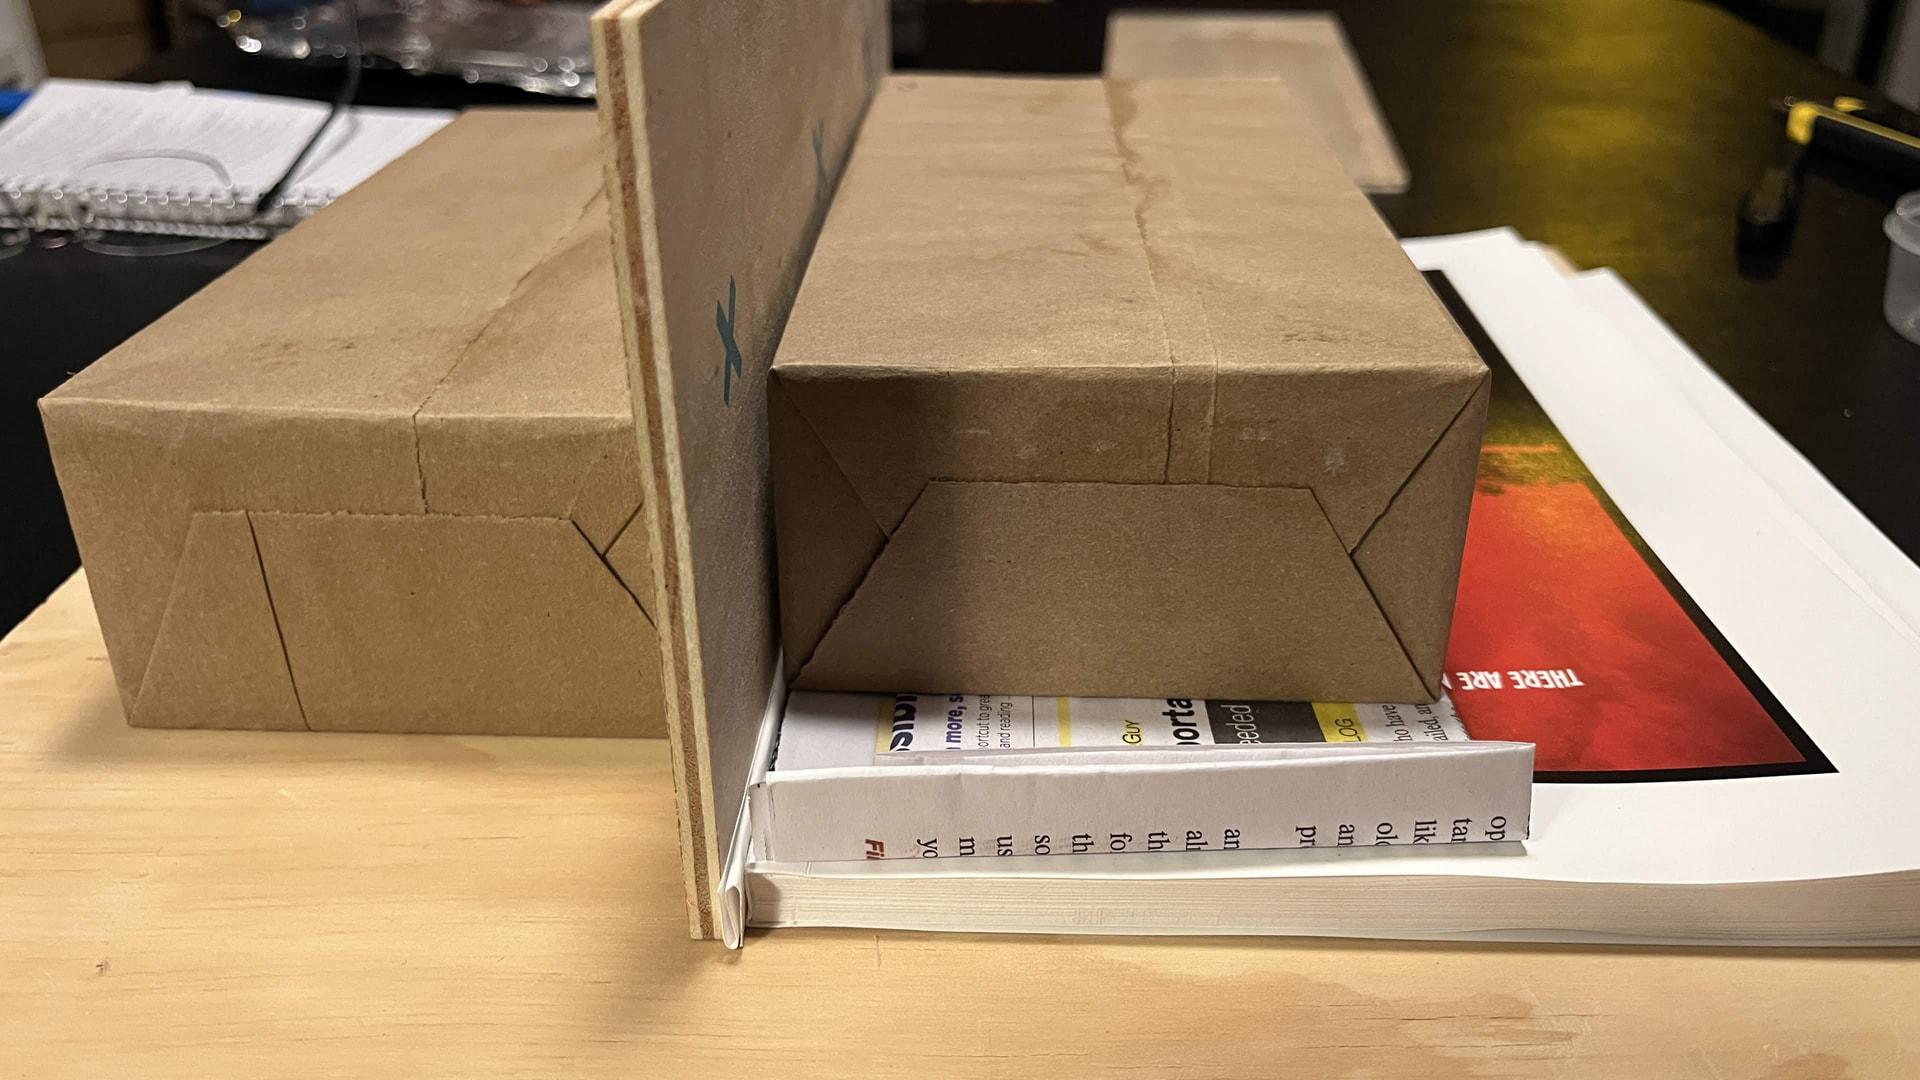
Using my utility blade here along the edge was meditative and smooth for a while however it takes SO long to cut through this much paper, roughly 55 sheets, that it really started to fatigue and hurt my hands.
The binding with the glue was SO much more difficult to cut through eventually I remembered that I have these mini miter saws by X-acto. It really couldn’t be better with the super long blade (compared to the razor) it made short work of the spine. However this too has it’s down side as the cut is much more rough than the razor blade.

I have slowly been trying to conceptualize a custom tool, that I can fabricate within my means, to improve this method. Late last night after getting up after recurring nightmares it came to me. I will share that if and when I am able to put it together. Hopefully later today.
Also the final cut I found to STILL have drift and it will need to be re-cut. I am okay with that at this point. In fact, I am going to use the extra agency I have here (the extra white area) to practice multiple cuts until I find a method that works for me, then I will make my final cuts.

2 Likes
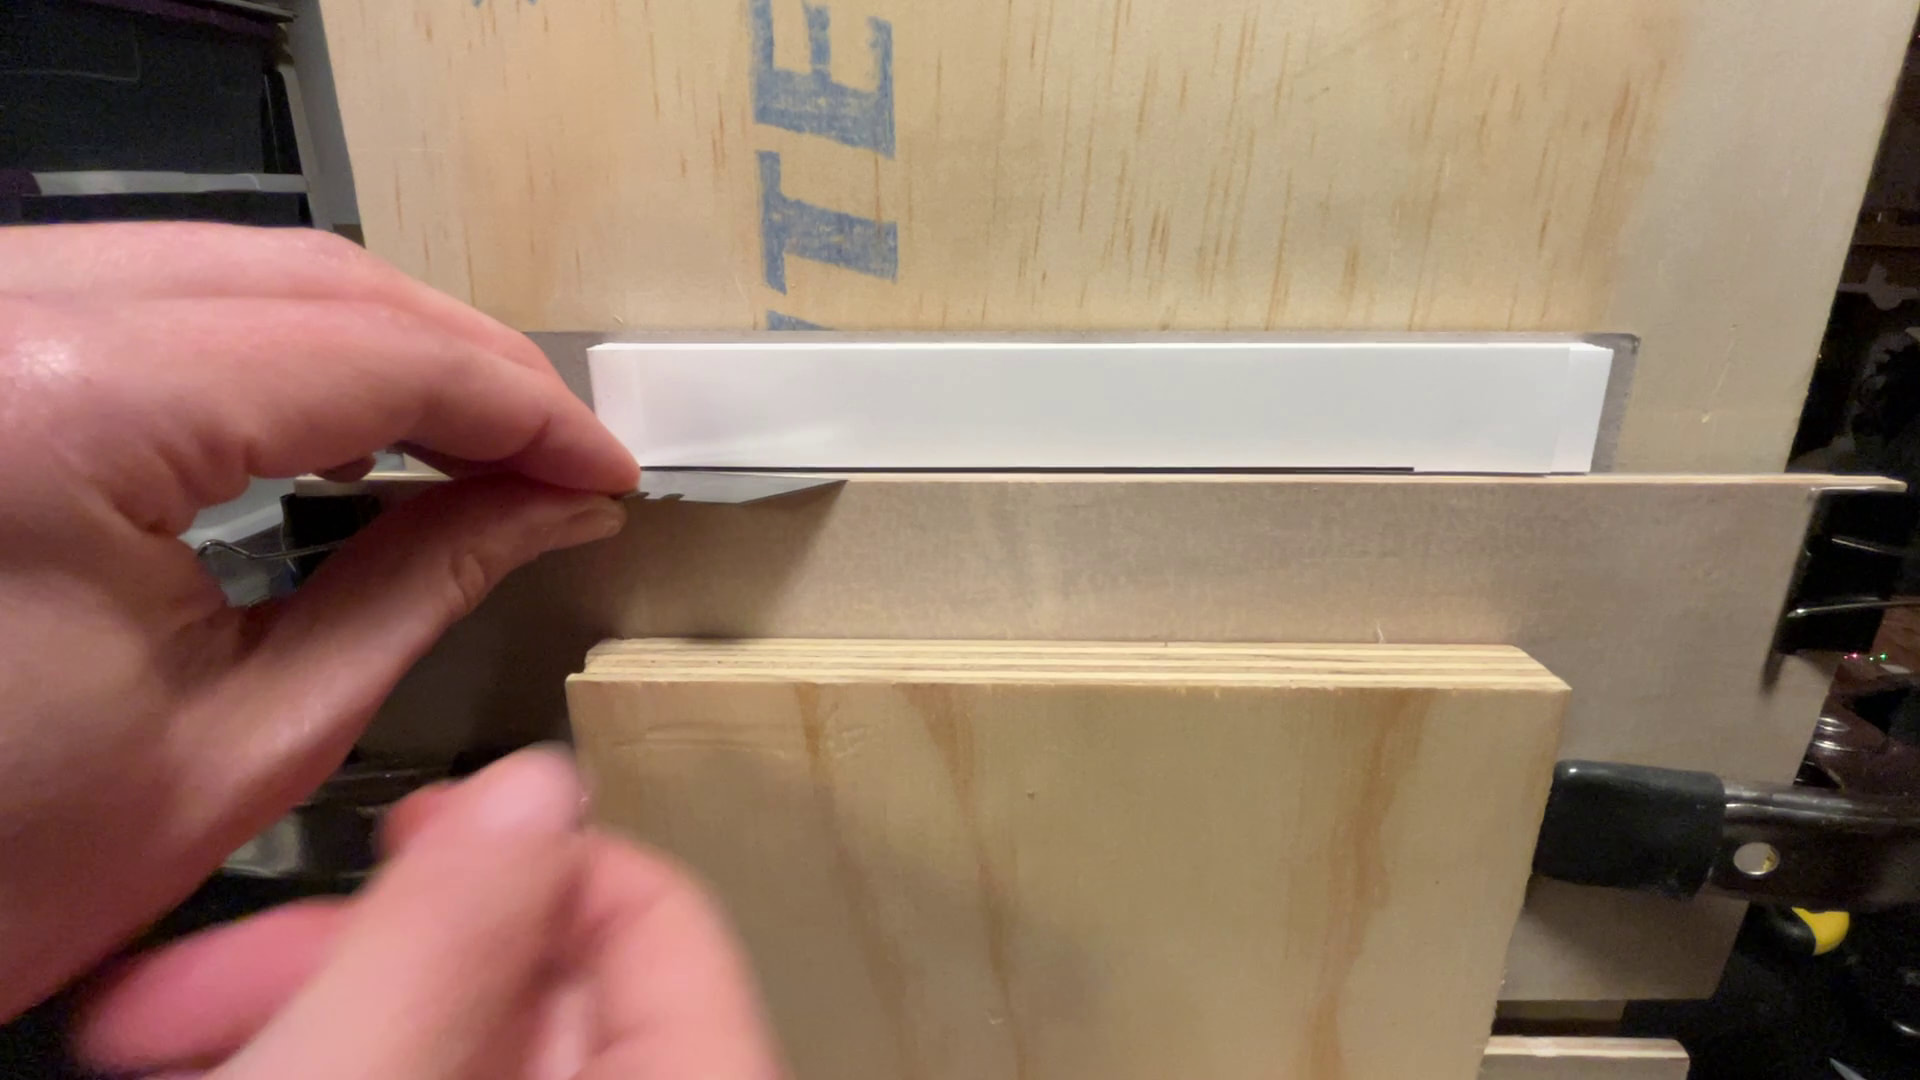
This is the design I conceived of in the middle of the night last night made manifest.
It’s a flush plunge cutter. Butting it up against the surface and applying pressure it automatically levels itself and progressively cuts deeper. It totally worked. The same cut that took me an hour and a half last night took me ten minutes tonight. And it is the most beautiful perfect finish cut. Like glass. I can’t believe it wasn’t cut with a guillotine. However, the same issue was in the result. A crooked cut. Now I realize it’s because I am using a double beveled blade. I got the idea for this whole approach after watching a guy cut a book with a chisel. A chisel is a single beveled blade.
So with every slice the blade is slowly climbing higher and higher. I am not sure how I will proceed next. I could use my salvaged perfectly flat mini miter blade and make that into a similar device but it will likely leave a somewhat rough edge, or I can try to source a single bevel razor blade, not sure if that exists, or I could stop everything and start learning the craft of sharpening blades myself and sharpen my old ass dull chisel…after going through all of the trials and errors of THAT hobby…then I will have one $10 book.
I need to sleep on it. It took me the entire day to get this far.
At least now I know it’s not me, I’m just using the wrong implement.
I have another idea too… one I haven’t seen, and that’s to sandwich the book between two pieces of ply and use my circular saw. >=)
I’m just about there.
If I use a very fine tooth blade I think it would work honestly.
2 Likes
This whole thread making me feel like I need to be more productive in the middle of the night. I’m really slacking here.
2 Likes