News of UnderQuest’s delays got me thinking about revisiting Iron Helm. In doing so I rediscovered a little mod I had developed for adding a “display rack mode” to the box from the Iron Chest expansion. “Engineering” this kind of Bespoke Cardboard Widget™ to support setup and gameplay is something I do for a lot of my games, and I am here to share in case any of you, like me, just think it’s neat. You could do a similar thing differently with a 3d printer, I’m sure, but I prefer the kraft paper aesthetic, its non-toxicity, and… well a lot of it is basically free, or rather, you’ve already paid for it. My Widget™ is made of from a corrugated cardboard box that came in the mail.
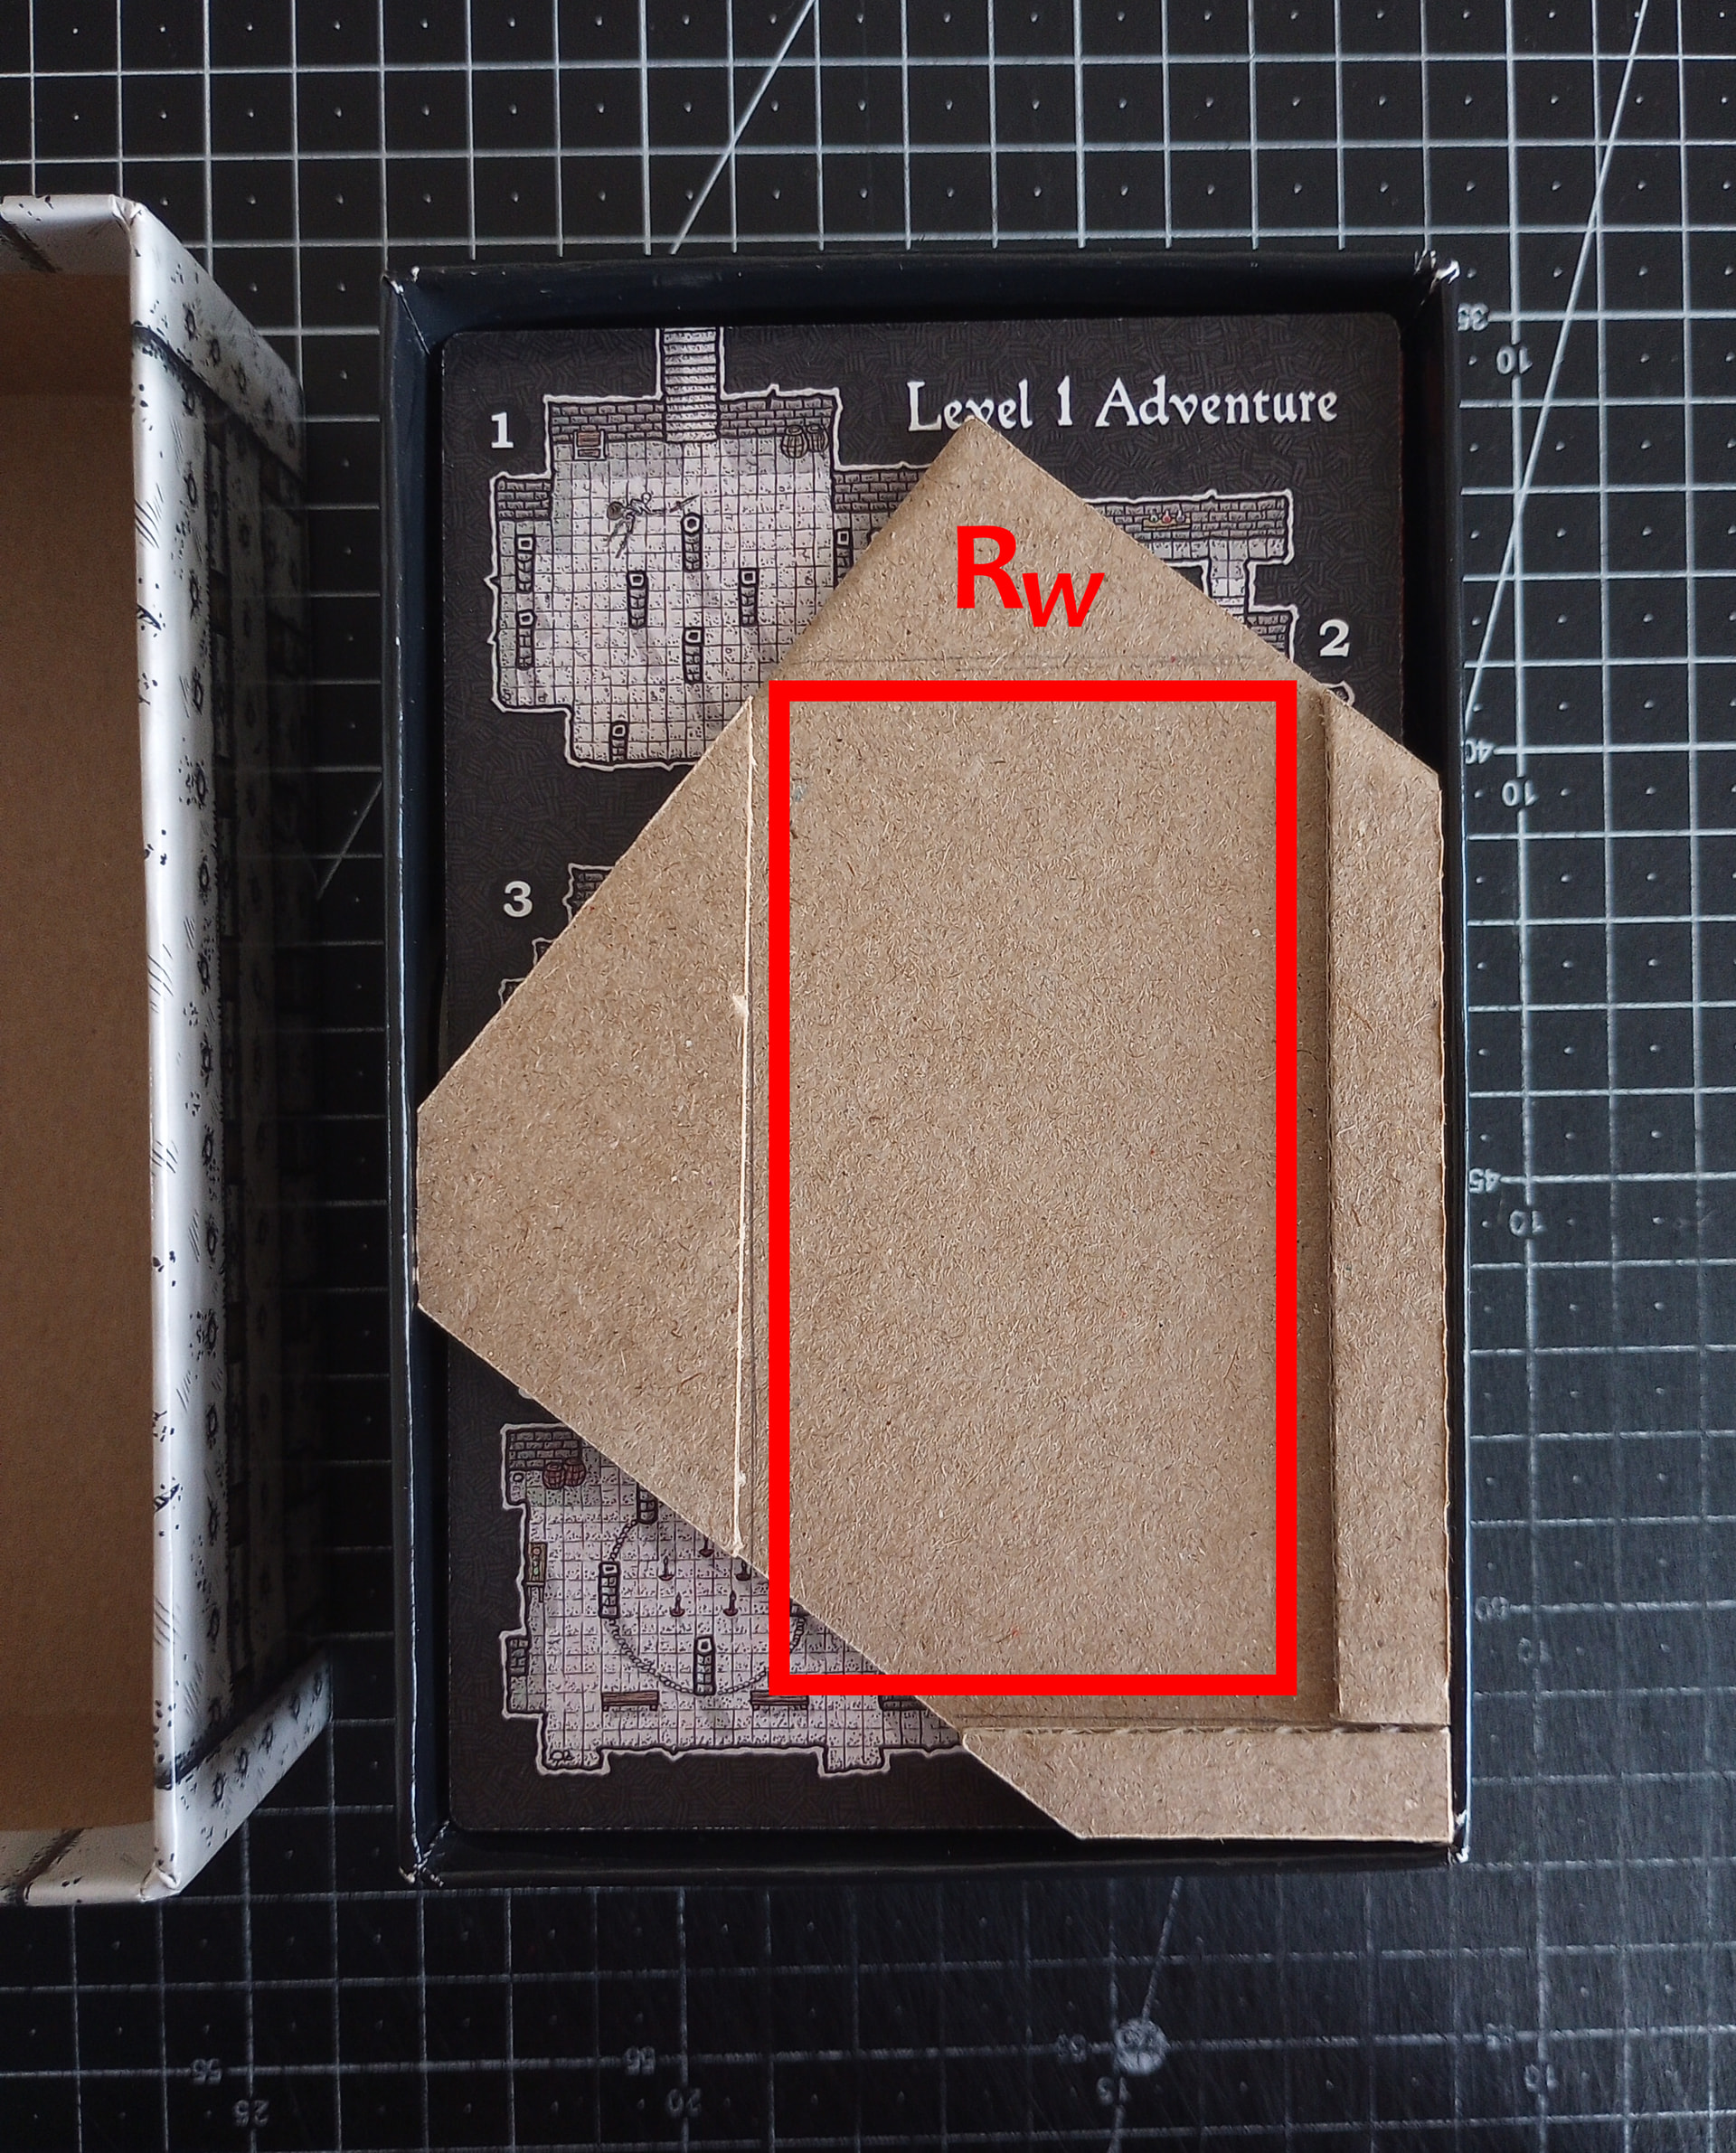
Figure 1: The Widget™ sits inside the box bottom at an odd orientation. The red rectangle “Rw” will reappear in later figures as a point of reference. The Widget™ is dual-layered, with upper layers along the left, bottom, and right edges of Rw. All the area within Rw (and the area above its top edge) is the lower layer.
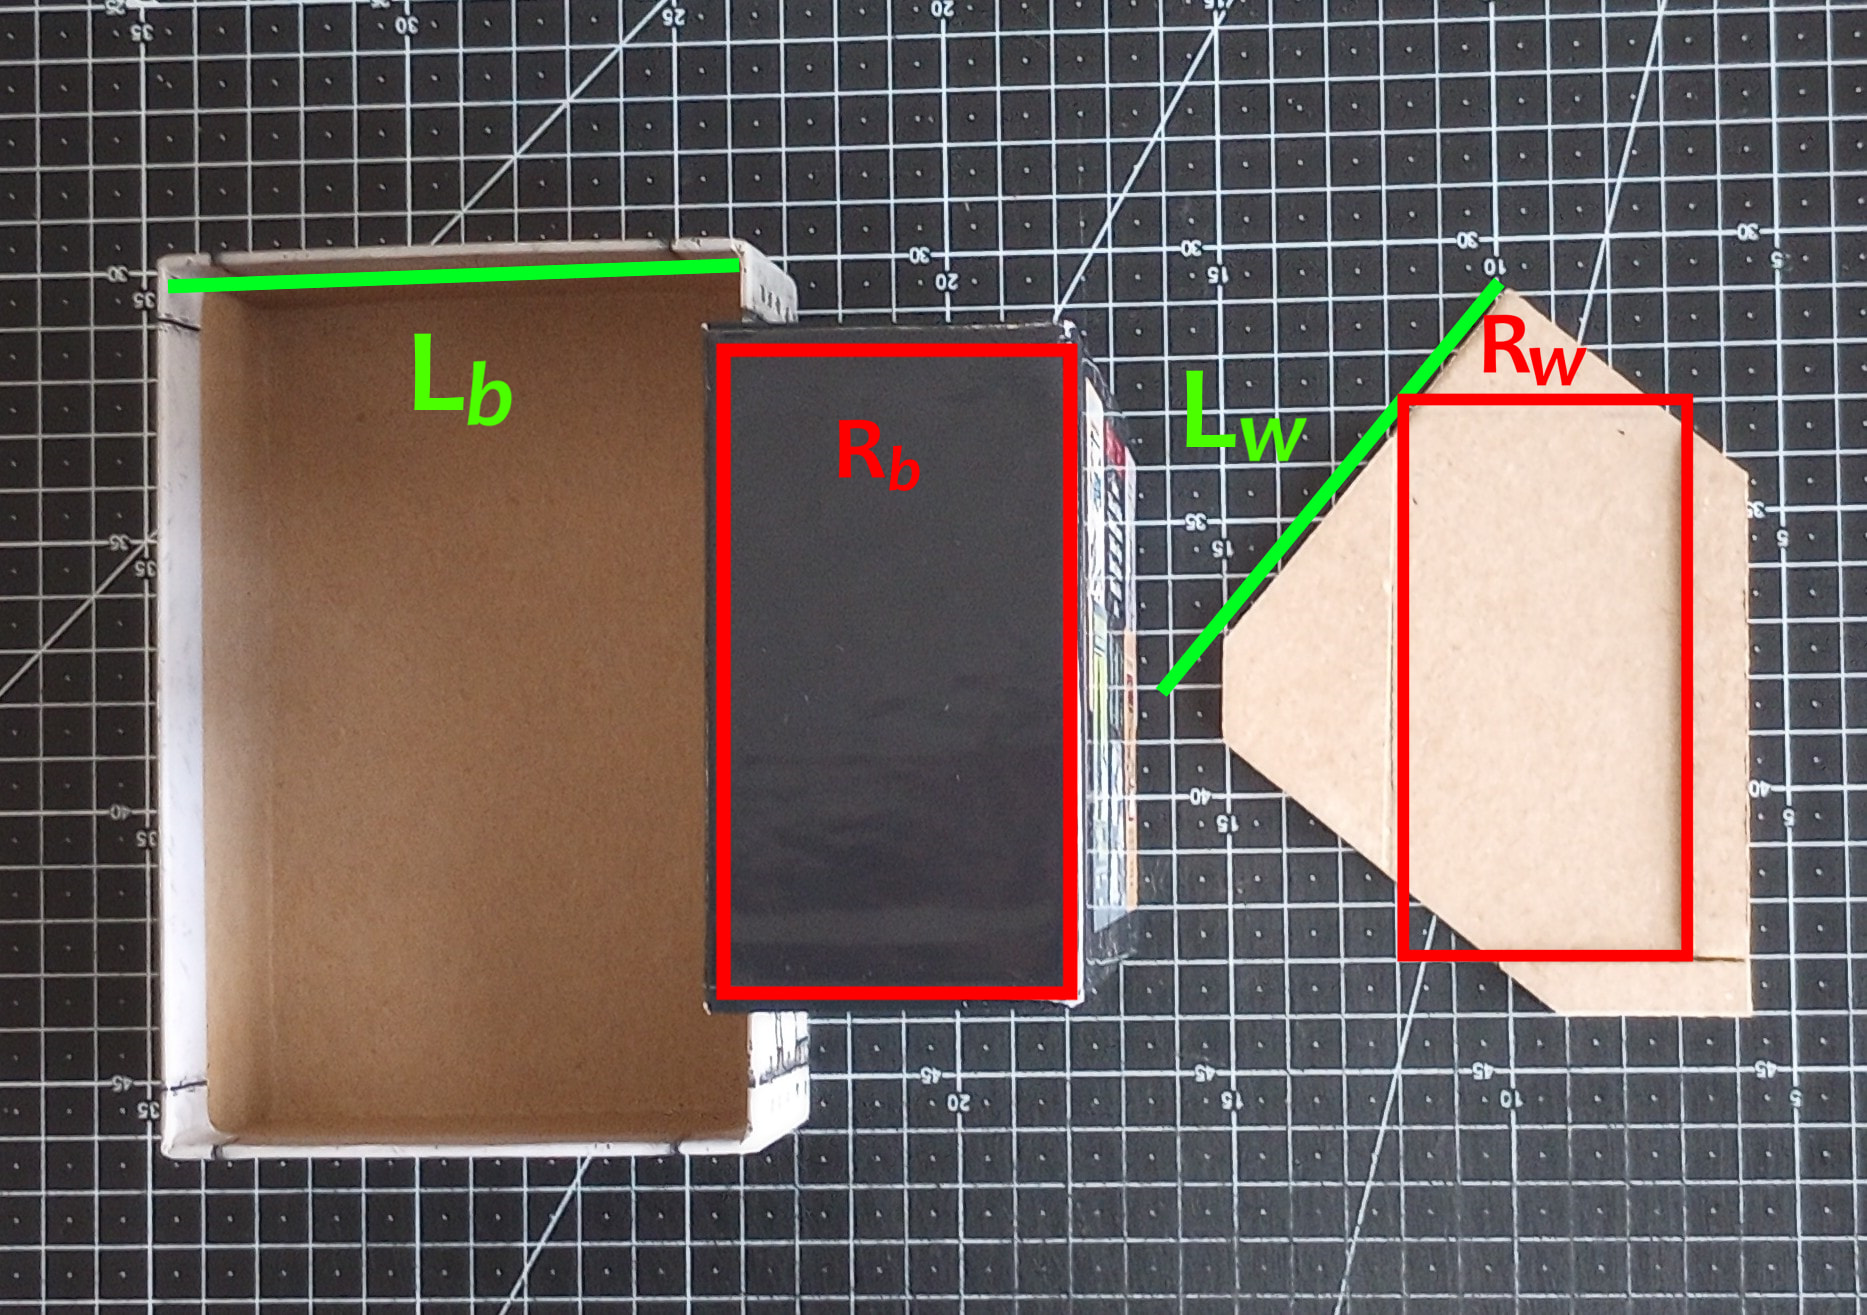
Figure 2: L-R: the box top is laid upside-down, the box bottom is stood up on its short end, and the Widget™ is laid with Rw labelled as before. This perspective helps us highlight that all the dimensions of rectangle Rw on the Widget™ are equal to the dimensions of rectangle Rb around the outside of the box-bottom. Similarly, the length of line Lw along the edge of the Widget™ is equal to the length of line Lb on inside of the box-top.
Figure 3: Insert Rb into Rw, then slide the combined box-bottom+Widget™ into the box-top, inserting Lw into Lb. A handmade token tray inside the box-bottom (just trimmed/folded cardstock) now becomes easily visible and accessible during play.
With the right dimensions such a “display rack” might be made for other small box games. It depends on how much “wiggle room” there is between the box top/bottom and how thick your cardboard is.
7 Likes
That’s great! Looks super useful.
1 Like
Literally and figuratively thinking outside the box.
3 Likes
Welcome back, widget fans, for another installment of “you can do this with cardboard!”
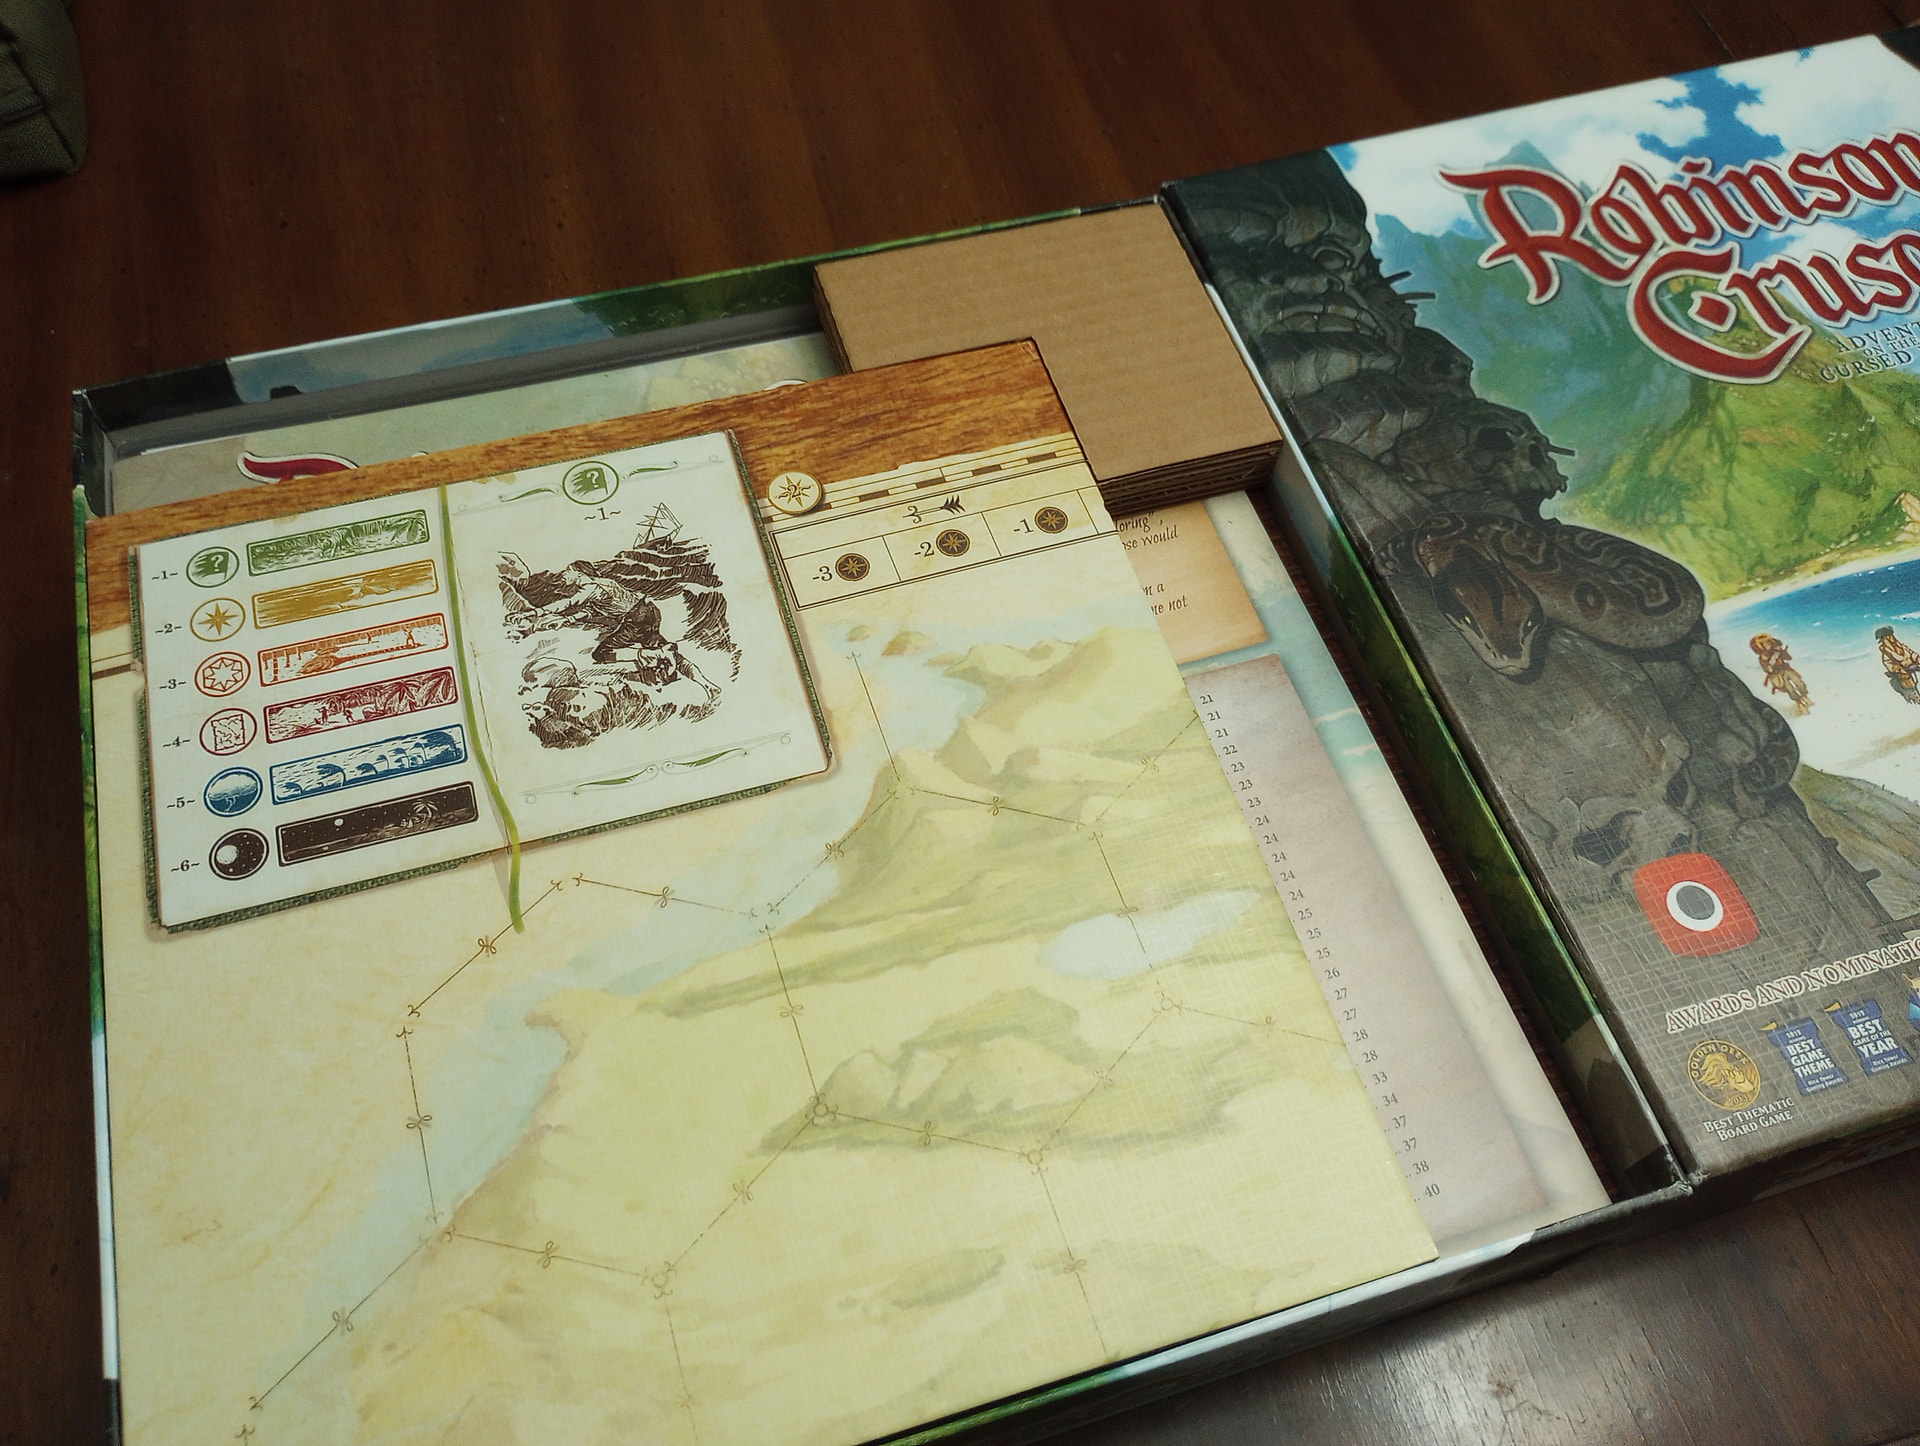
Two widgets from my copy of Robinson Crusoe.
The Corner-Thing
Are you tired of all the crap in your game box sliding around because the folded board ain’t exactly the same size as the box, so there’s a bunch of dead air around it? (Use your GENeral Abilities of Imagination to fill in the blank for this infomercial: you see a sausage-fingered troglodyte clutching an open board game box. With glassy eyes and a slackened jaw, they slosh the box with vigorous, full-bodied motion –it’s as if they are simultaneously panning for gold and trying to get a hula hoop up and running. Components fly out of view. Great exasperation, directly to camera: “Bwwahhh??”)
‘*SLAP’* stop it. Make yourself a Corner-Thing:
Take measurements, cut a bunch of layers of cardboard into an identical L shape and glue them together. Stick it in the corner. Now things stay put. (Bonus: if you store games vertically on your shelf you can get a nice firm grip around the corner of the box that holds a Corner-Thing without dishing the box-top.)
The Token Dispenser
Got a stack of medium-sized tokens you’ll be randomly drawing from, but it’s a one-time use thing instead of a bag-building “back you go” thing, so it doesn’t merit a Crown Royale bag? Make yourself a Token Dispenser:
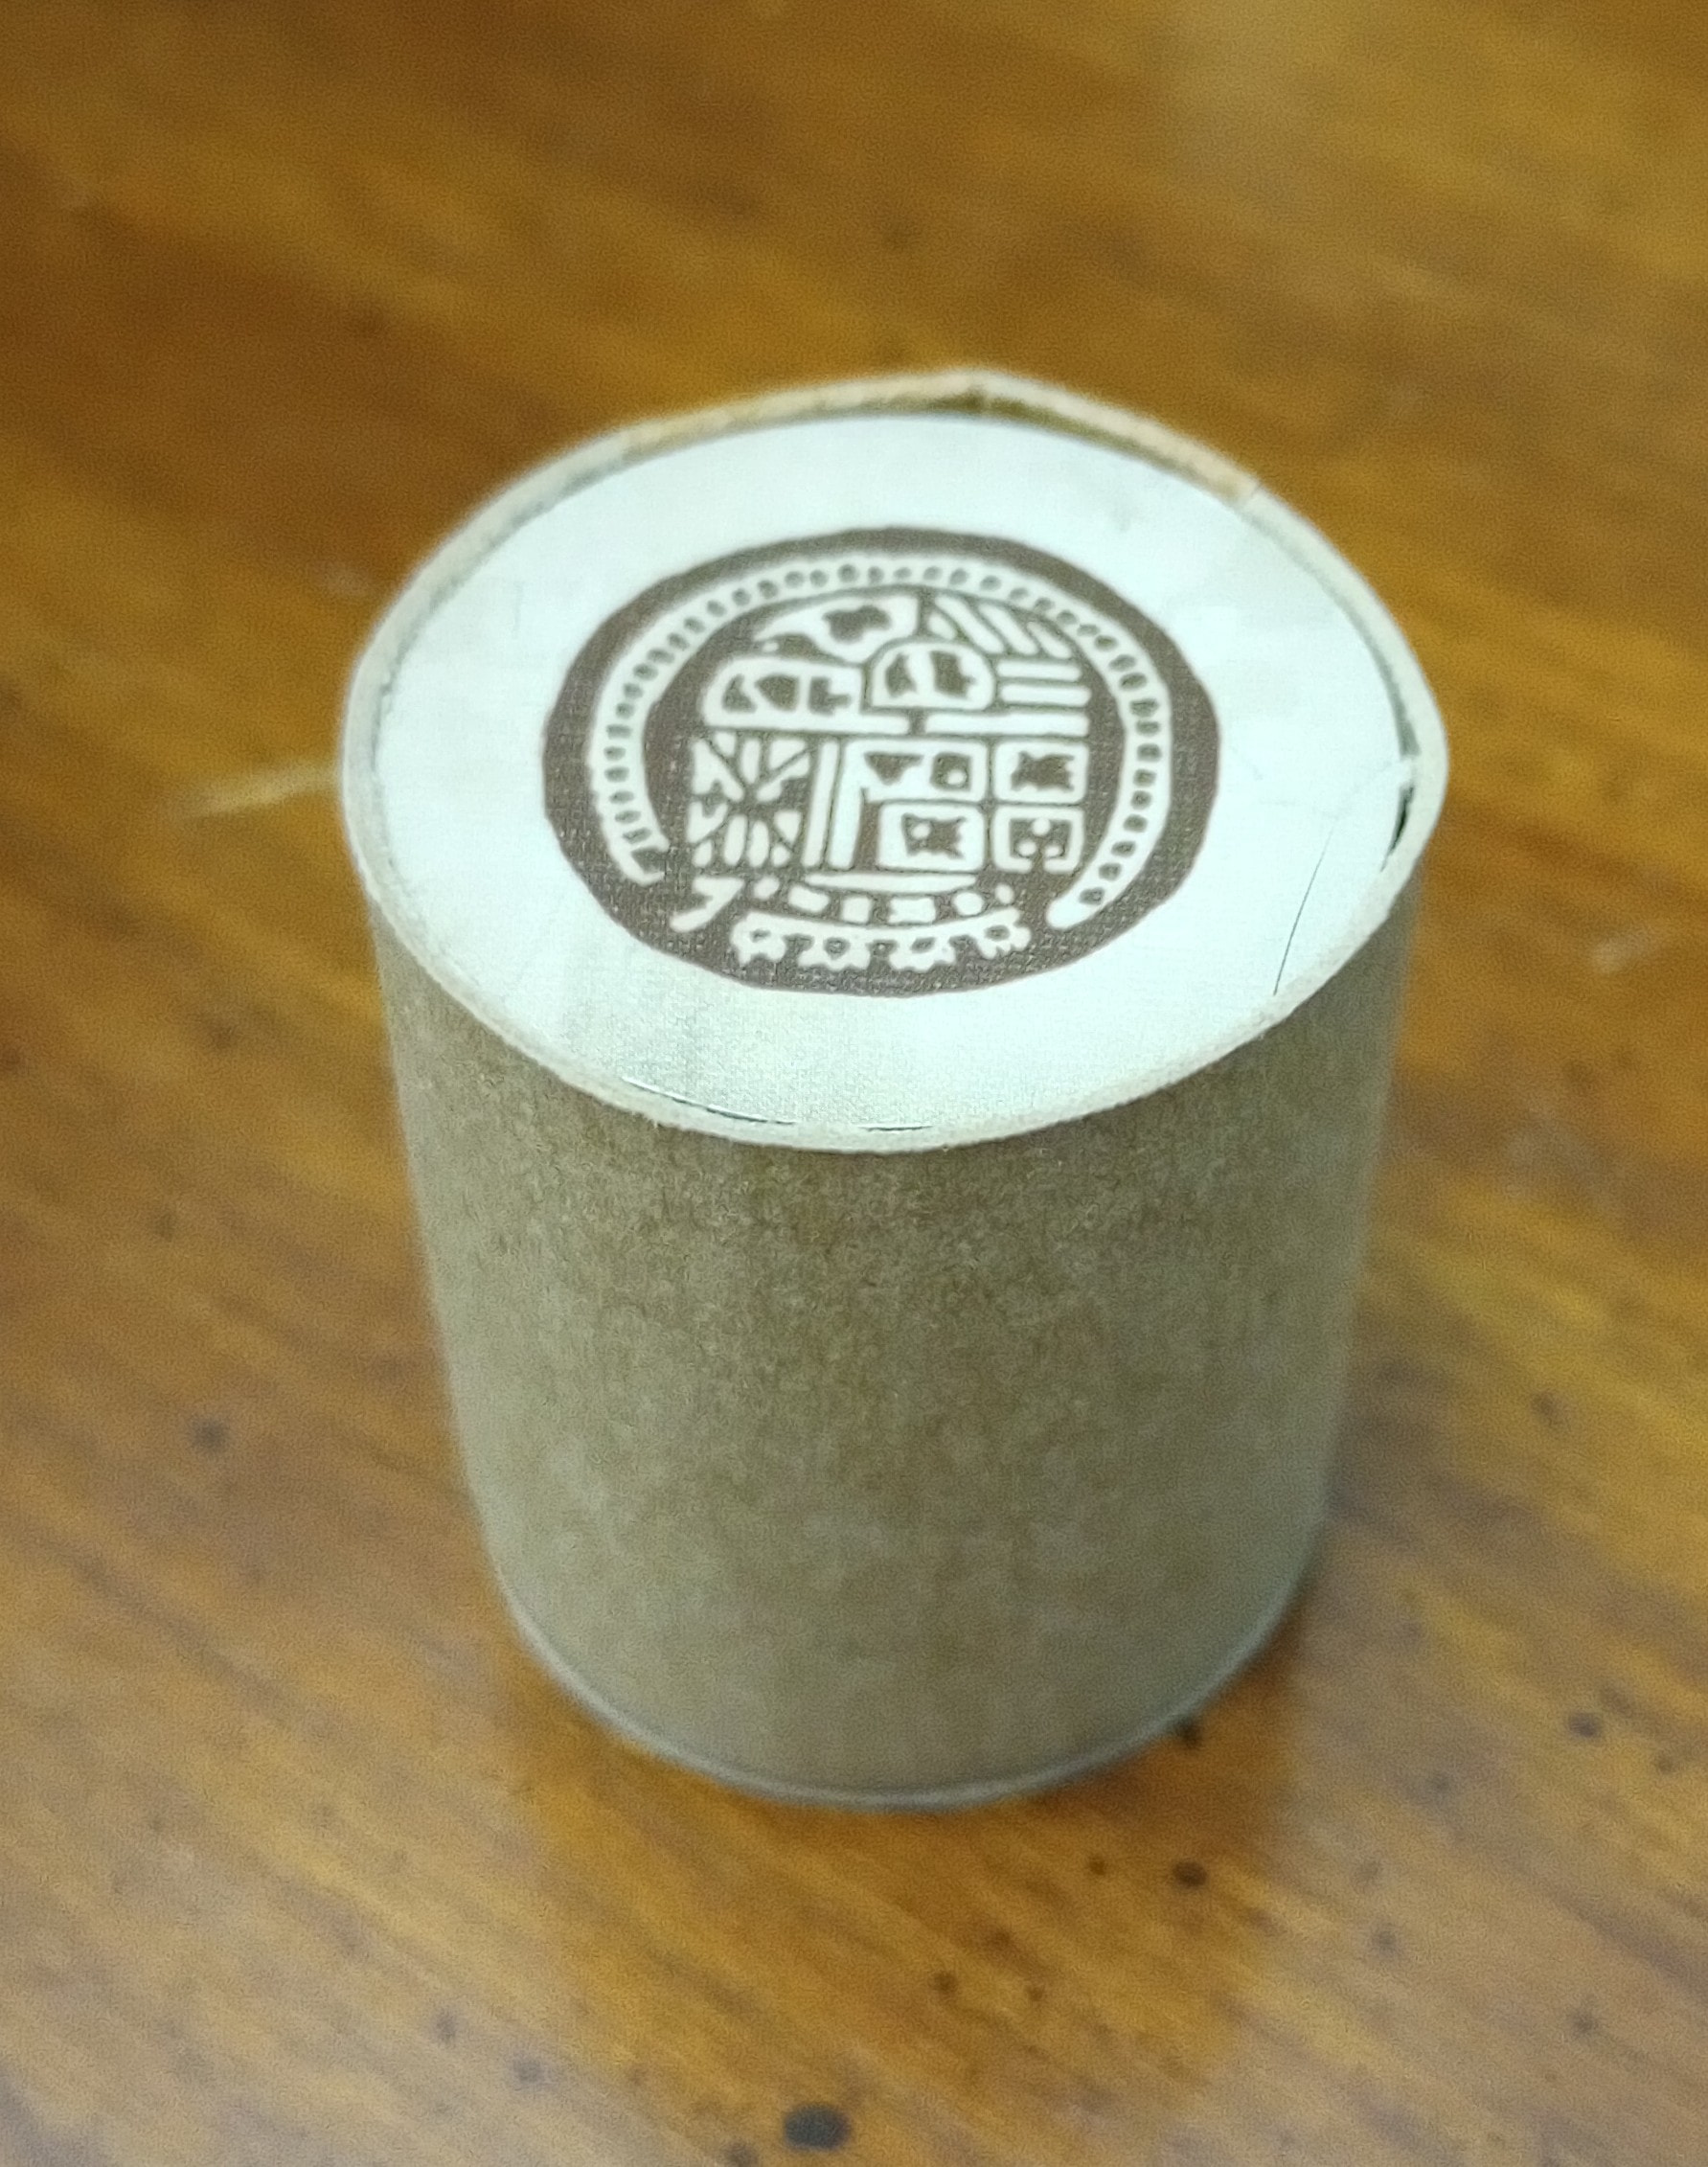
Using thinner chipboard like you would find on a cereal box, you want to cut a strip of the chipboard such that when you wrap the strip around the stack of tokens to form a column, the “grain” of the strip runs “vertically” up the height of the stack (rather than running “horizontally” around the circular edges of the tokens). Flex the chipboard a bit before you cut it, you’ll see what I mean – it’s easier to get a curve when the arc of the curve is “against the grain.” Measure and cut.* Use some pva glue and tape to seal the column by fixing the 2 ends of the strip together. (Don’t get glue on the tokens.) Cut at least one round disc and then remove its center to make a “donut” to glue to the bottom of the dispenser. Poke through the donut hole to push tokens up from the bottom. A circle cutter helps if you want it to look nice. You could add a thematically appropriate, decorative outer wrap of some kind if you like.
*If you like (as shown here in pic 3) add a second disc inside the column (same size as a token) so that you can’t accidentally see what token is on the bottom of the stack. If you do this, factor in the height of this extra disc when you cut the strip.
3 Likes
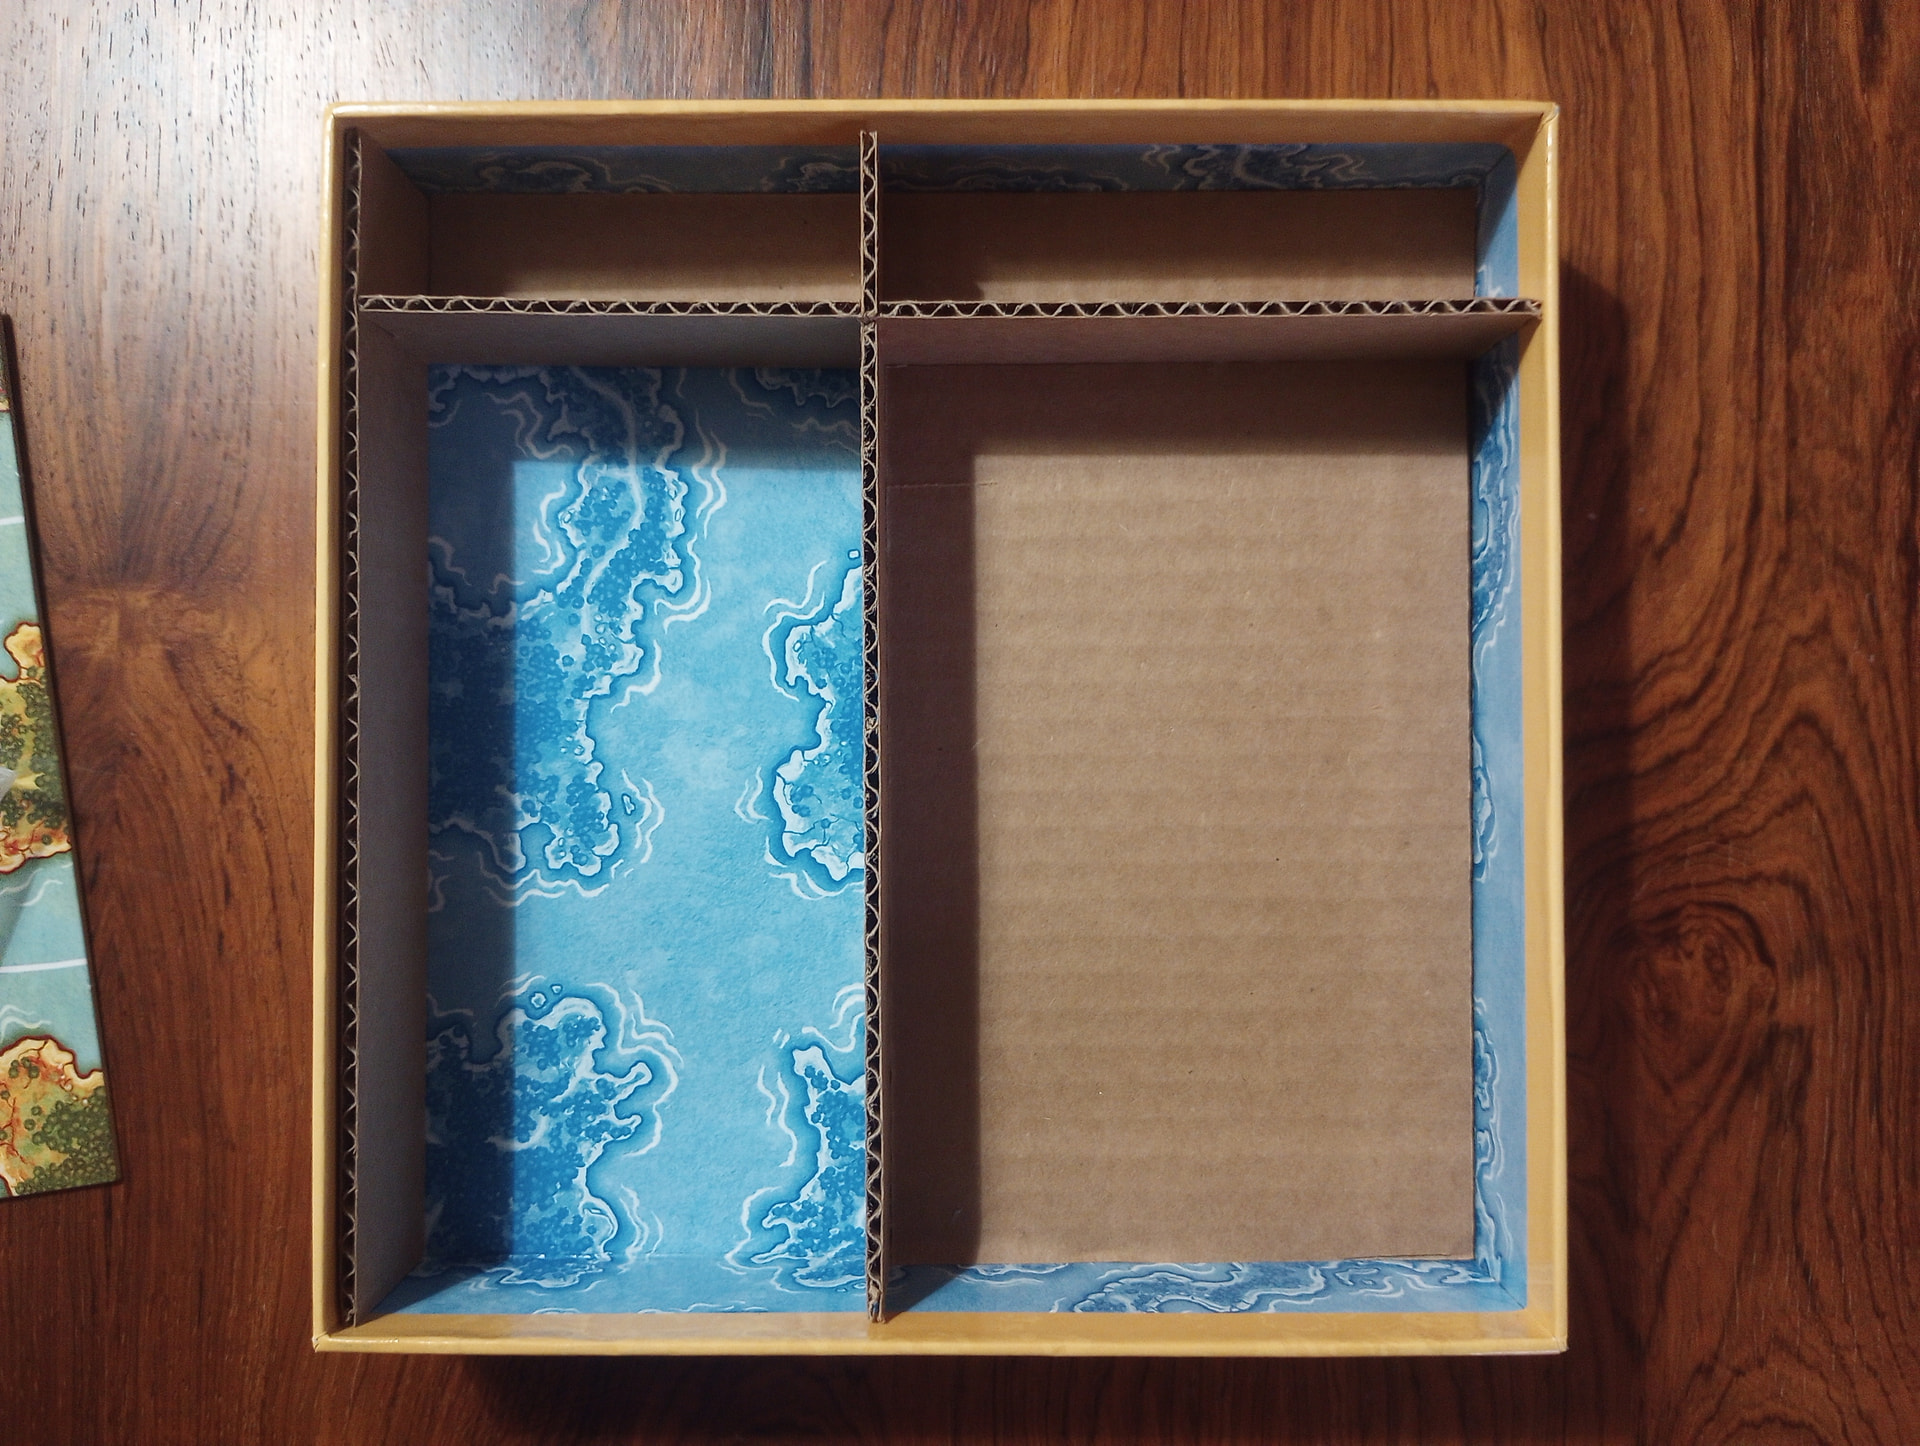
For today’s adventure in cardboard, try making your own inserts. You don’t need a 3D printer or foamcore, just a couple clean sheets of cardboard, a craft knife, a ruler, and maybe some glue. The “inside flaps” of any modest-size box you receive in the mail often do nicely.
Here’s an example with a small box for the 2-player game Akrotiri.
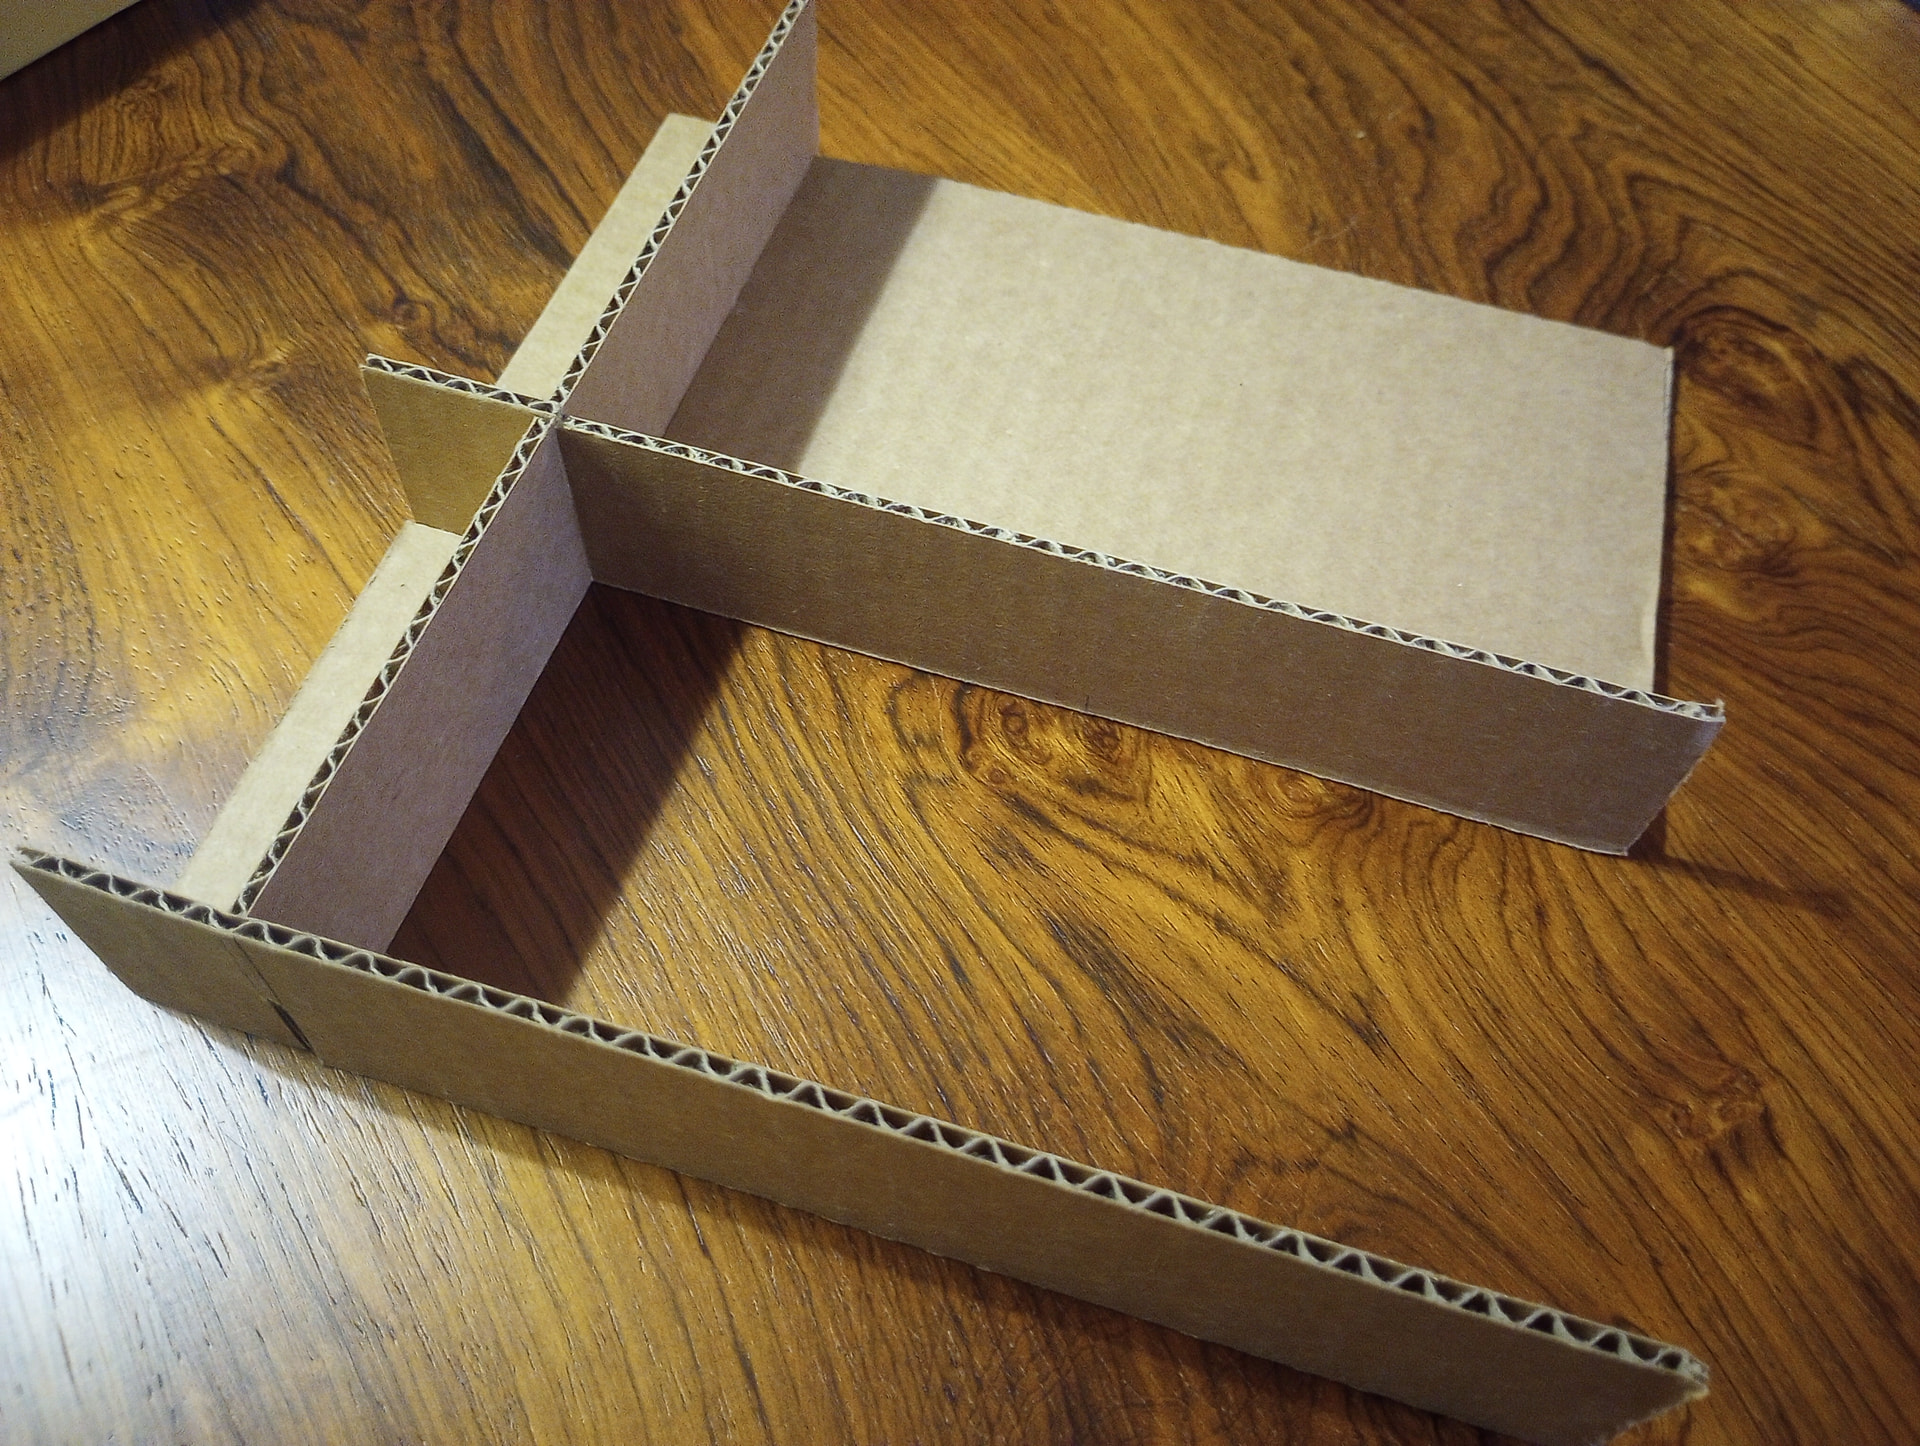
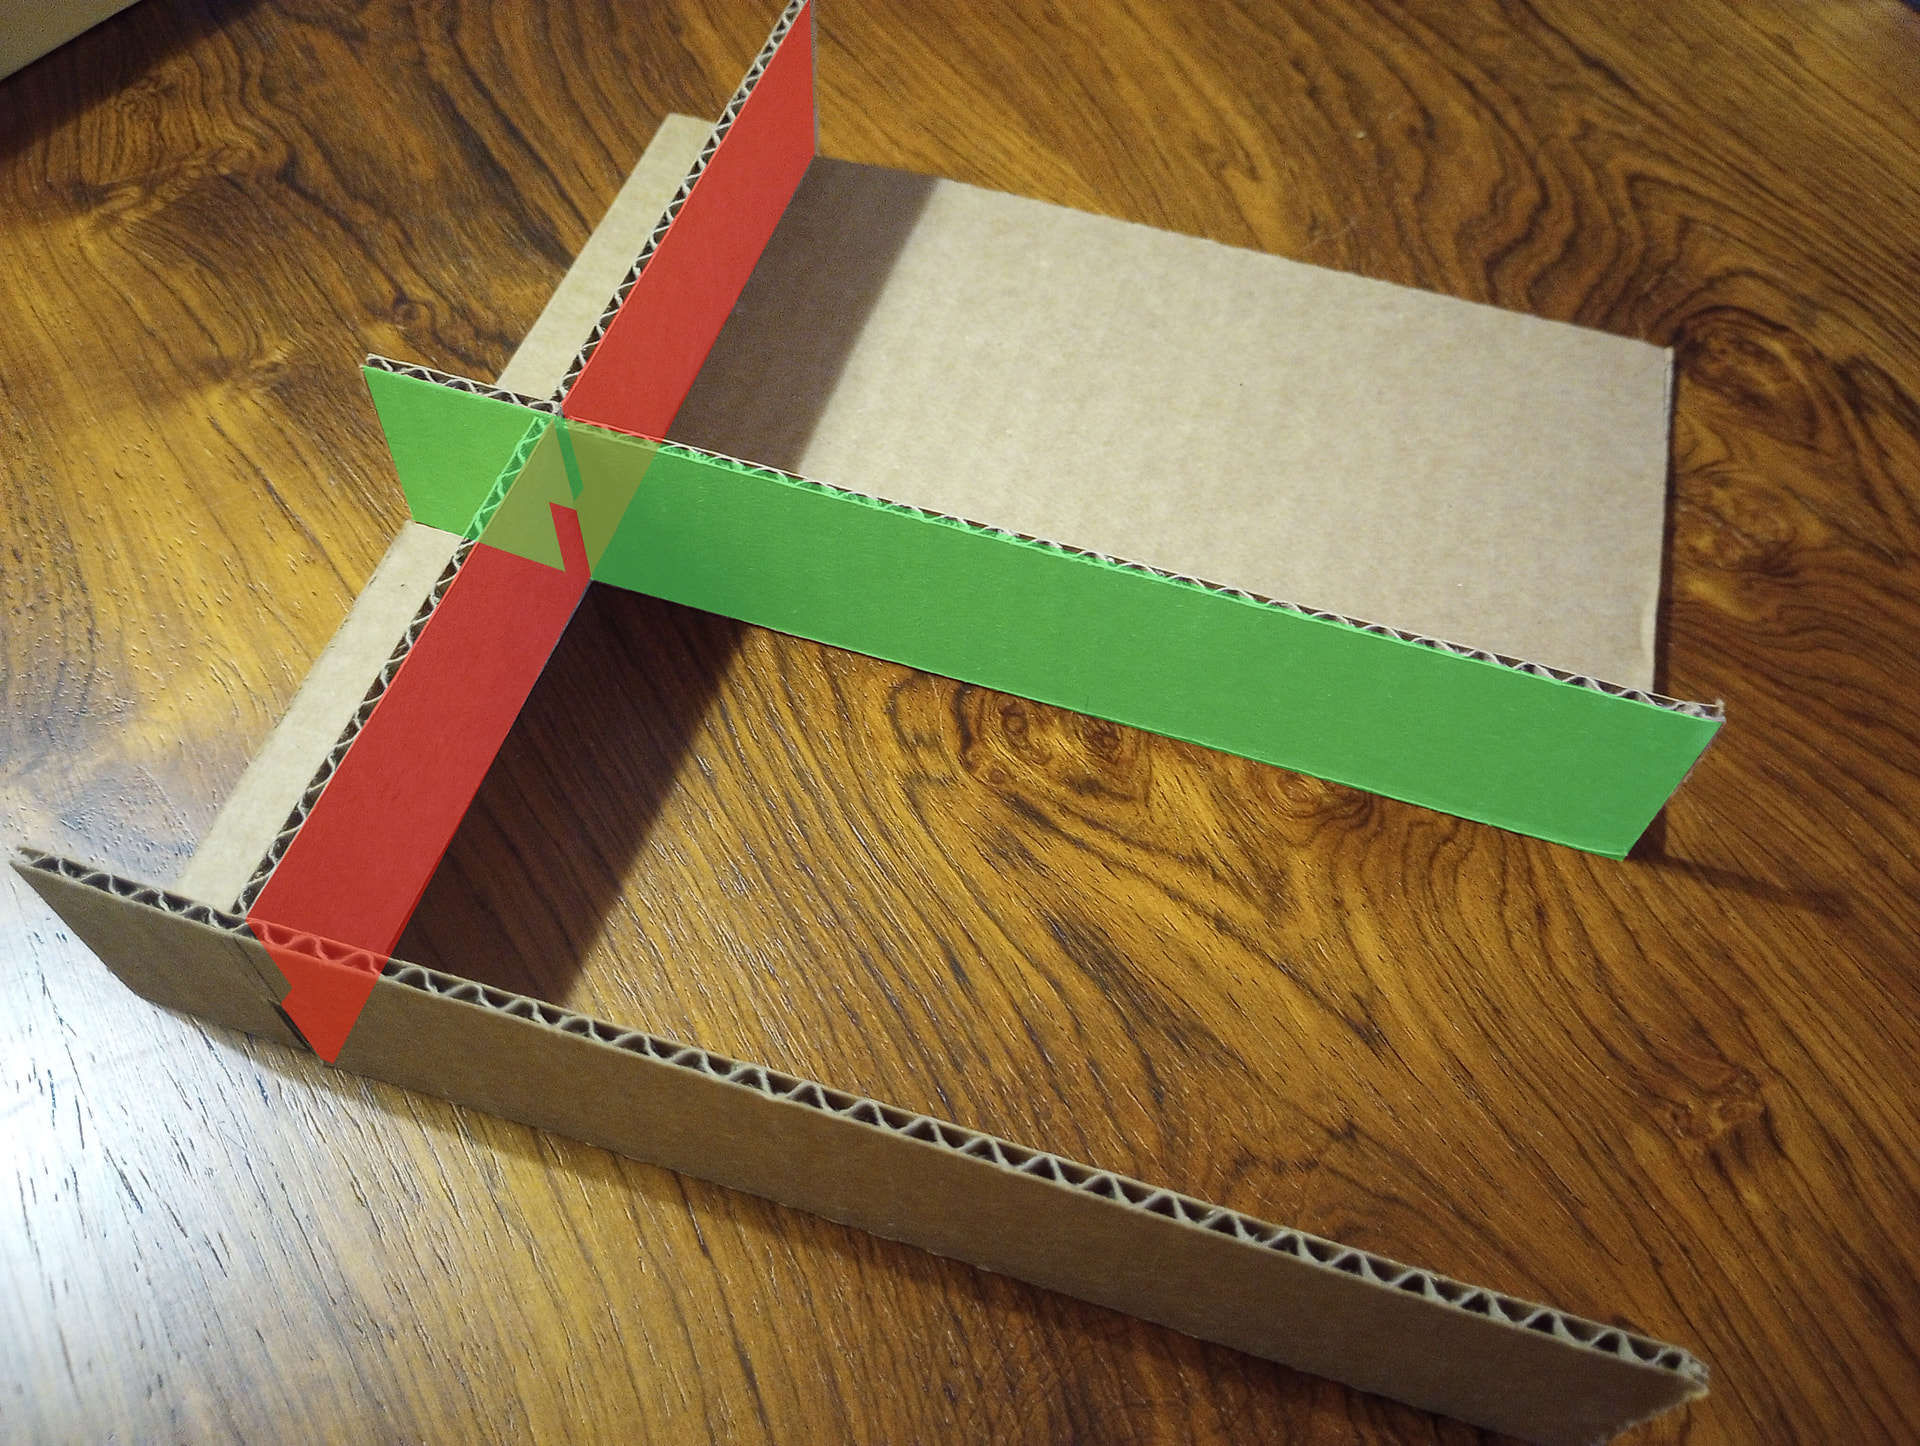
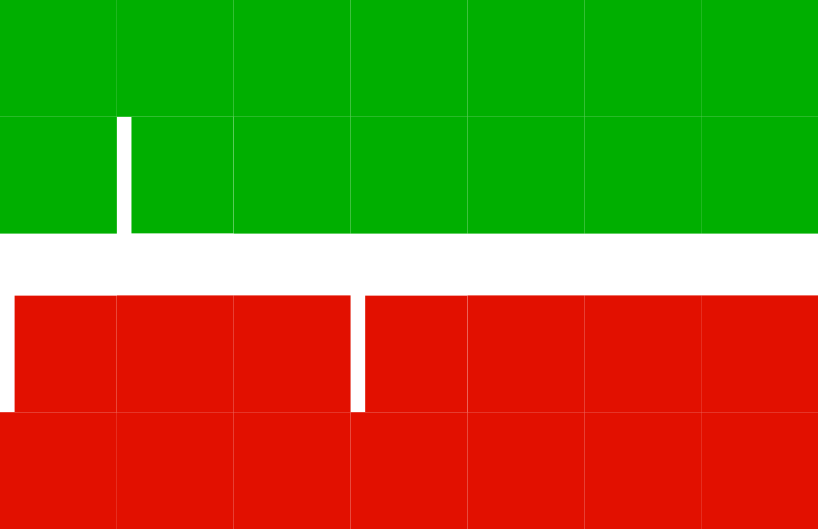
The insert is just some walls that divide the box into different regions. Start by cutting all the walls you need to fit the length, width, and height of your box. In this case I have a total of 3 walls, plus some “floors” under some compartments. I was mainly focused on the compartment in the bottom-left corner that’s holding map tiles. I measured out where the walls should intersect to create a compartment in which 2 piles of tiles fit snugly, and then left the rest of the box for leftovers. I’ve used red and green highlighting here to schematize how to cut small notches in the walls so that they slide together at their intersections. 2 walls in the green pattern + 1 in the red pattern make the core of this insert. Some glue at the joints, plus the floors, adds stability,
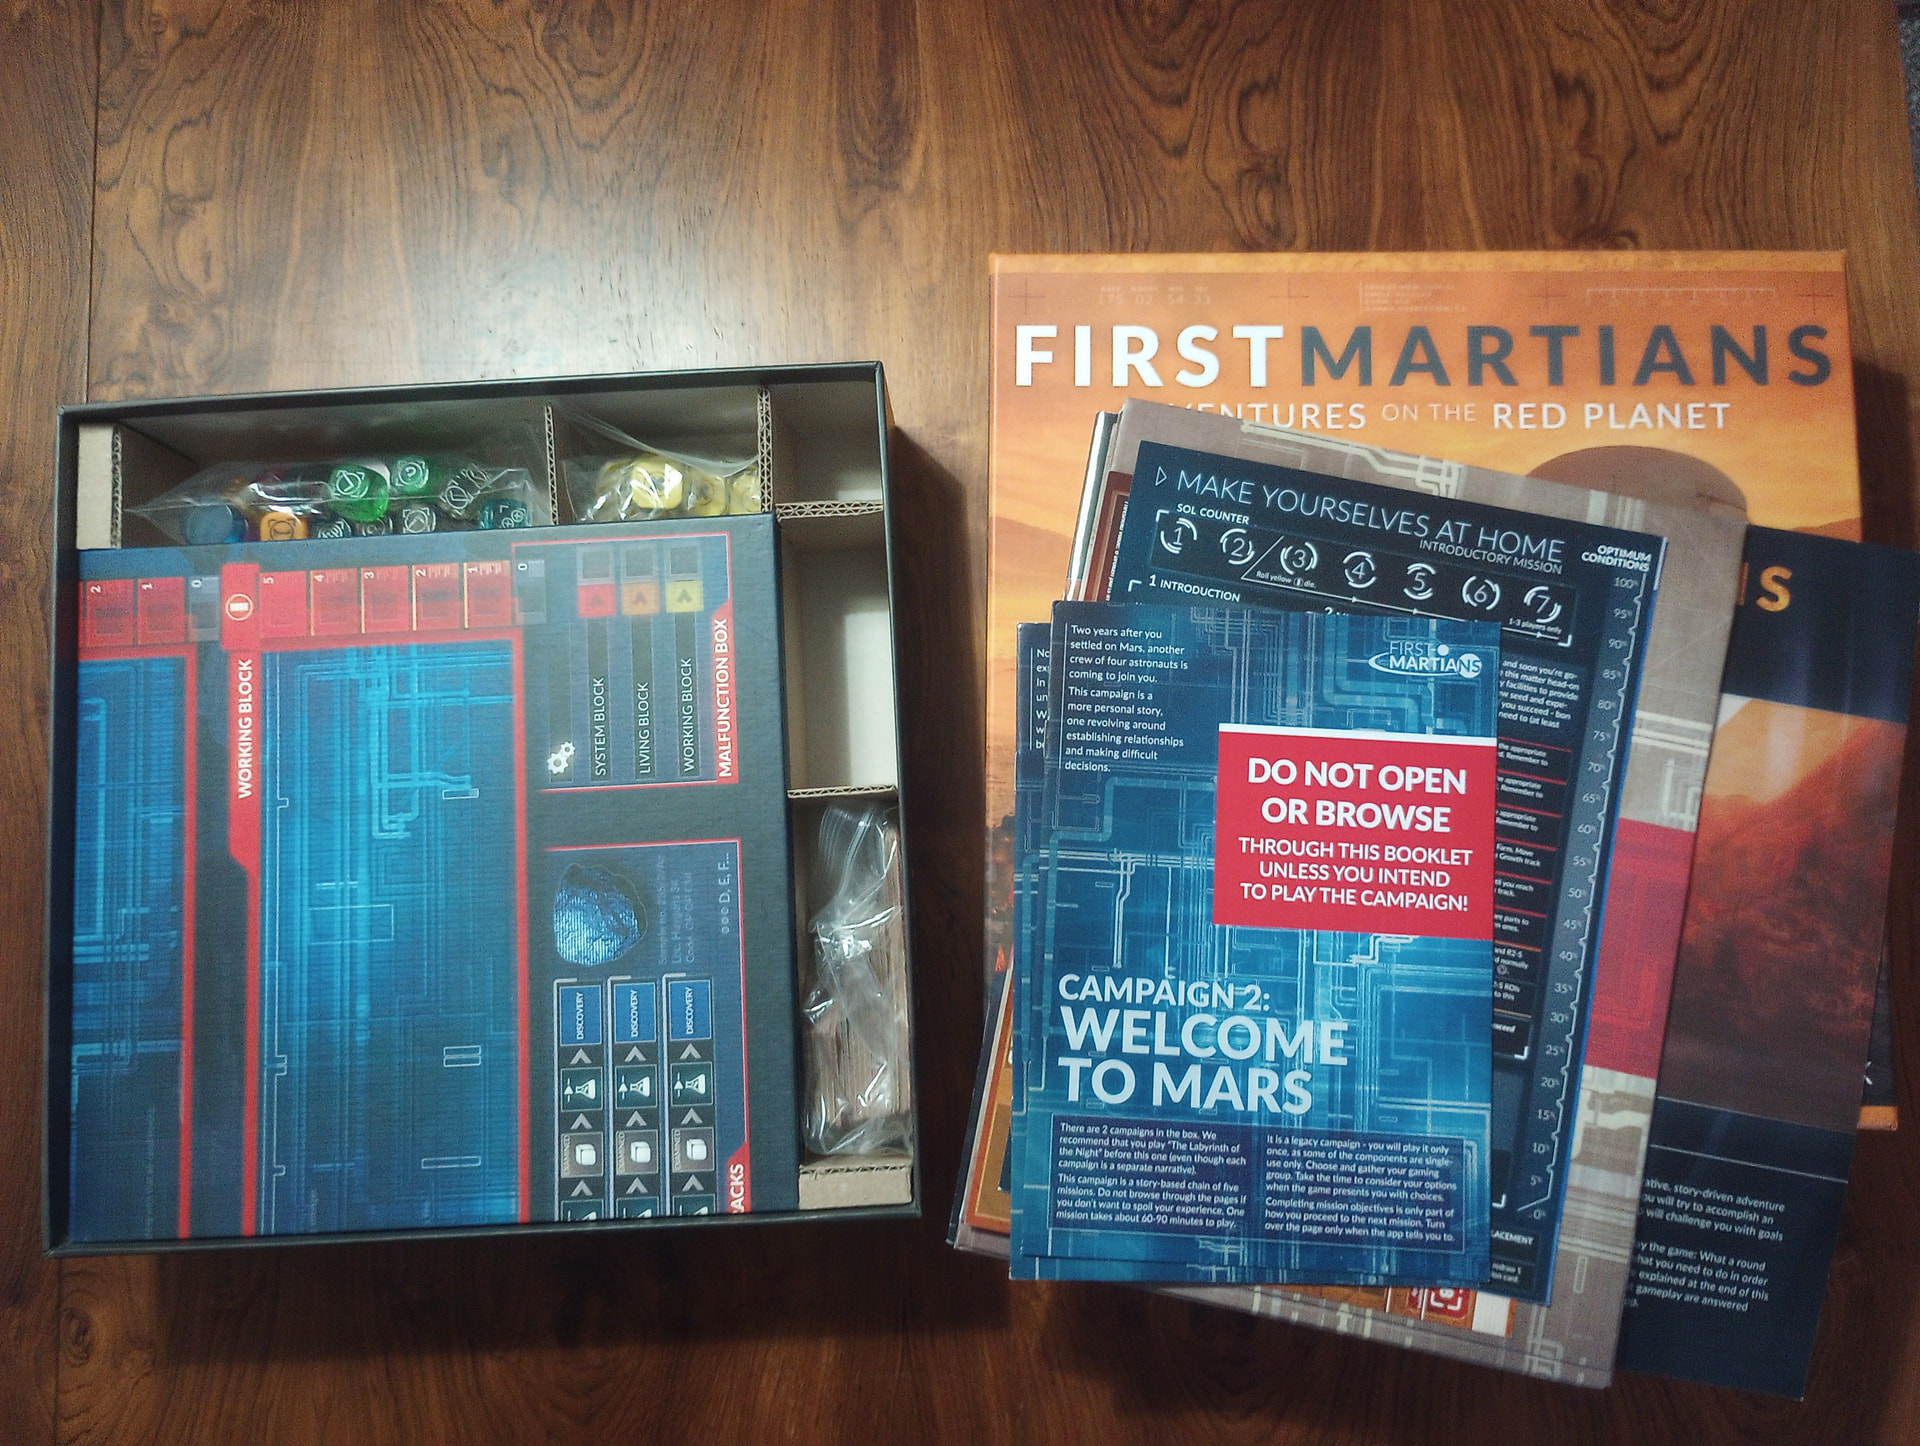
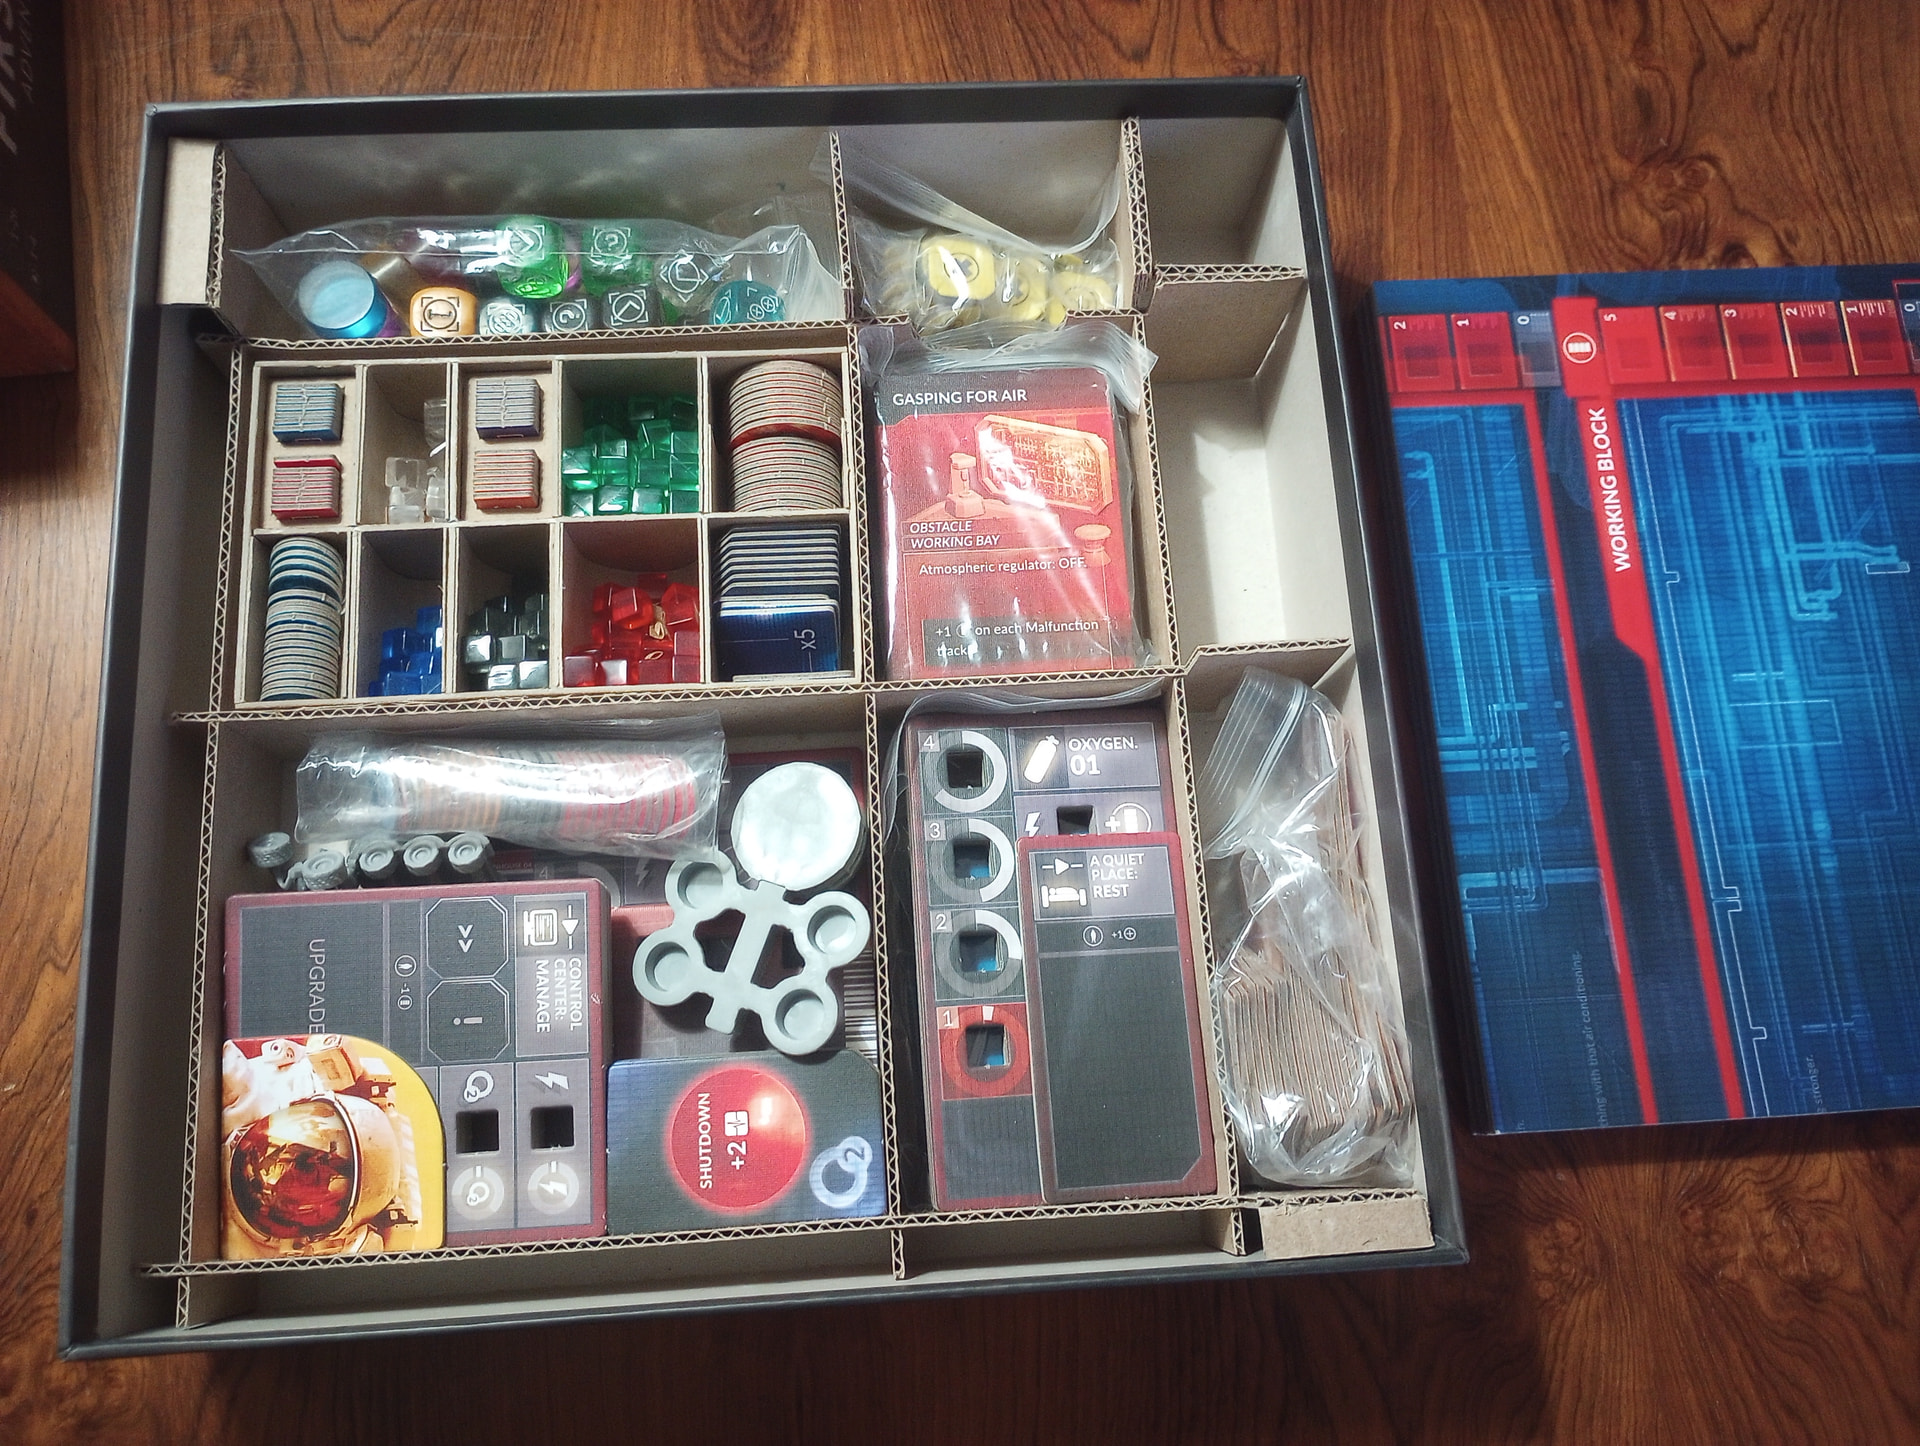
For heavier boxes, add more walls in each direction and, if needed stronger cardboard. Here’s an insert for First Martians… admittedly there’s not a huge demand for this specific design but it’s for uh, illustrative purposes.
In this case, to make room for the large folding game board, I made all the walls run at 2 different heights. Near the lower chambers in the bottom left, the walls are cut down to leave room for the board to sit above them. Out near the top and right edges of the box, the walls are higher, to hold the board in place – but still lower than the box’s full height. When it’s packed up with the scenarios and rulebook laying over the board, everything is snug. Three walls in the green pattern and three in the red pattern is all there is to it.
Cardboard: the more you know.
4 Likes
Oh man! I totally love and appreciate this! It’s so friggin clean! Looks like it was done on some kind of miniature table saw with cardboard simulating plywood.
I will have to read deeper on this post before I start asking questions, I am totally interested in how to do this.
1 Like
This warms my  . I am most definitely using this as a bit of a proxy for a woodworking/carpentry hobby that I could ill afford (or execute).
2 Likes
I love woodworking. I have rudimentary experience in all kinds of arts and crafts. I hope someday to have room to have a proper table saw, plainer, router, etc. If I could get into miniatures sized equivalents that would really tide me over.
2 Likes